The running joke yesterday was that I have a problem because I like to drill holes in perfectly good boats. Unfortunately, it seems to be a reality, not a joke....
Half Shell

The verdict is in: One boat down, one to go. I finished Half Shell yesterday. I had a lot of help from both my dad and from Jenny. It was a brutal day for working outside, since it was 90ish degrees, and last week was in the 40's. Luckily my parents live on a pond, so we did go for a swim before the first thunderstorm of the summer hit. That also helped to cool everything off so that work could continue.

I had to put a new transom board in the dingy, and I decided that I wanted to make it so that it could run an outboard, so it had to be pretty hefty. The pressure treated board was initially just going to be glued into place with 4200, but then we started thinking about what else we were going to do. I had picked up a drain plug so that if I did happen to hole the outer shell, or the joint between the two halves leaks, I can drain out the water. I am not one bit concerned about the dingy sinking, since it is all flotation between the layers.
Hole #1- Drain plug: I had to drill a hole, since there was no place for a drain in the original design. After the hole was in, I used 4200 to seal the drain plug fitting to the boat.
Holes #2,3- To finish the mounting, I had to drill 2 more holes so that I could put in stainless screws, which went through the fiberglass and into the pressure treated board.
Holes #4,5,6,7- The cap rail in the original design wrapped around the aft corners of the dingy, and while I could reuse the holes from the previous rub rail, I did have to pre-drill the board behind. You can see that the screws were a bit too long, so had to be trimmed off with a Dremil tool.
Holes 8,9,10,11- Because the dingy weighs 6000 tons, I wanted to put cleats on the back of the dingy so that, in combination with the bow eye, I can use a sling and the rig on Lady Lucile to lift the dingy out of the water and on deck by myself. The two cleats on the back of the boat were through bolted to the transom board, making the transom board secure. It also meant that we no longer needed clamps to make sure the 4200 set up with the board in the right place while we went onto the next step of the process.

I could not find the rub rail that was on the dingy originally, so I had to improvise. I found something that looked like it out work, but it was a big production to make it fit. The original rail had been pop riveted into place, but I decided that I wanted to through bolt it because I have plans for the dingy in the future which will require me taking it apart again and reinforcing the inner liner. That is a post for another day though. The rail that I used did not have holes in it, so they had to be drilled according to the holes that were in the boat from the original rail. While I was using the drill, I did not put any new holes in the boat this time.

Hole 12- Because I want to maybe run an outboard on the dingy, it needed boards on the transom and inside to cope with the stresses the motor might put on it, as well and protect the fiberglass from the clamps in the bracket. While this was, in my original thinking, going to just be 4200'ed to the boat, we decided later that it should probably be through bolted. I went with 1/2 inch galvanized hardware because bronze was too damned expensive ($7 for one 1/2 x 3 bolt). I think in the end, this setup is going to be pretty slick.
Plumbing
That's right, its another hole in a perfectly good boat. I really need to stop this!
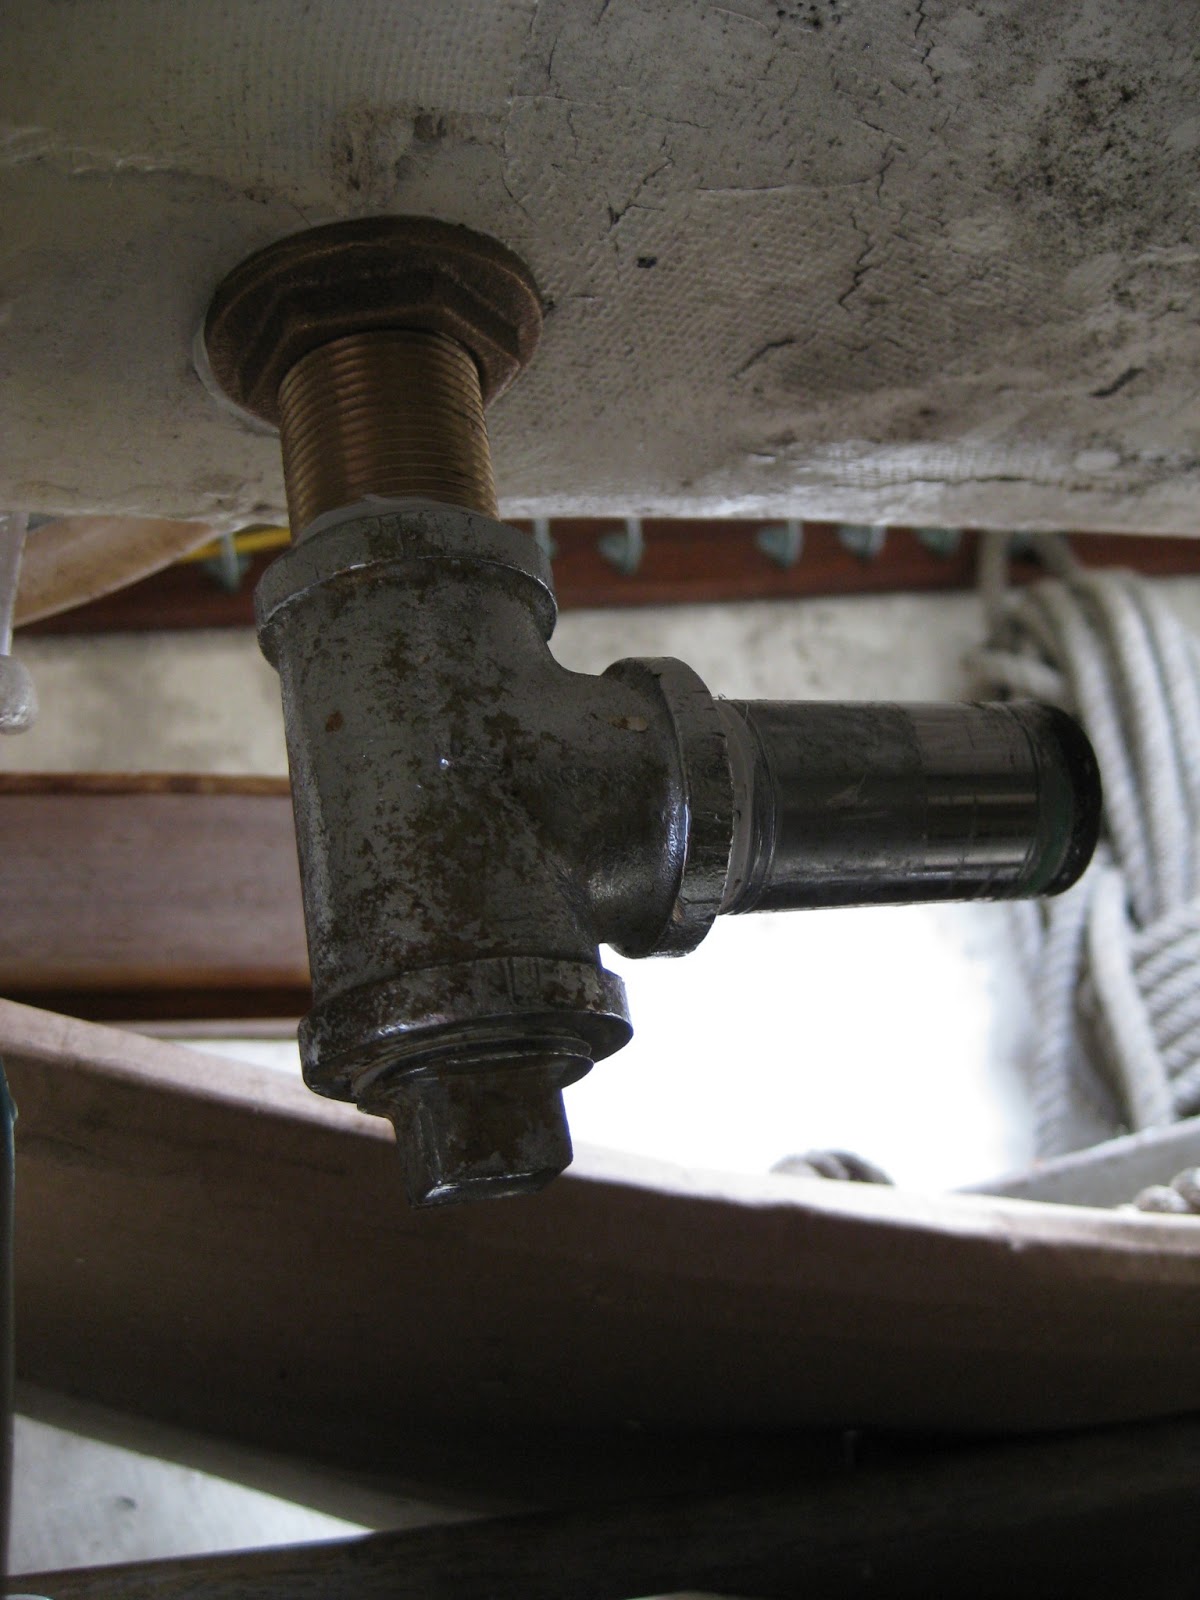
As you can see though, the previous owner had used a very small bilge line (not 1 and 1/2 inch tubing) from an electric bilge pump. Since I have no batteries, electronics, or even functioning navigation lights at the moment, I have no means to run an electric bilge pump. I do have a 15 gpm (gallon per minute) diaphragm, hand operated type pump, which I recently rebuilt. I thought it silly to choke off the pump by using smaller tubing than fit the inlet and outlet on the pump, so I got a thru-hull to suit.
I know, you're all wondering why I went with plastic instead of bronze. To get a thru-hull this size in bronze would have cost me something close to $50. The other thing is, it is NOT below waterline. In fact, it is about 2 feet above waterline. Unless I am burying the rail in 25+ knots of wind with all my canvas up, I am confident that it will not see sea water except when it is being ejected through it.
This ended up being the first project of the day, because the bilge was VERY full of water from the rain the previous night. I tried to mount the pump where it would be accessible, but still out of the way. I think I was successful, and even better, it can be operated from in the cockpit, even if it is very awkward to do so.
The reason for all the water in the boat was because the cockpit drains were not plumbed, so they just drained into the bilge. The starboard scupper drain is still not glassed over yet, but that will come soon enough. Luckily I saved the bronze hardware that came out of the boat when I was going through and trying to get rid of stuff and in general clean up so that I would have space to work. The parts came in handy with the bronze thru-hulls that I put in for the cockpit drains, because it is the same pipe thread as the seacocks that they were originally screwed onto.
Rigging and Misc.

I spent a good portion of the afternoon trying to figure out what was left of the running rigging. There was quite a bit of line pieces, since the lines for the main, jib, and spinnaker halyards were old and junk. I have pick Jim's brain some more, as I am not entirely sure which halyards are which. One of the wire to rope halyards was very small in diameter, so I think it might have been the spinnaker halyard, but there was another halyard that was through a pulley on the front side of the mast that was a rope only halyard. In essence, I am not really sure which is which. I did also pull the winch that was falling off the mast down so that I can rebuild it and maybe remount it. The sails are all small enough that I think that I can probably just pull them up by hand.
I also spent a few minutes and put the lock on the face of the main hatch. I can now lock the interior of the boat should I determine that is necessary.

 I have old teak on the boat, and it is bleached and nasty looking. I could have spent a fortune on the teak restore kits, but I opted to take the cheap, non-conventional road. I used 60 grit sand paper to clean the hand rails up a bit, which also brought back some of their color. Then I used tung oil instead of teak oil because tung oil is supposed to be more water proof than the teak oil. We will see how it weathers. The right rail has one coat of tung oil, and the left rail at the very top has been sanded, with the rest in the condition it came off the boat.


 Clive is a pilot that I work with. He also used to be a boat builder. Since I have been looking for a block of teak, I thought I would ask him if he knew anyone that might have something. Instead of asking around, he looked through his personal leftover supply of wood and found a 2"x2 1/2"x28" chunk of teak. Not only was it big enough to make a new winch backing block for the mast (left), it also went into making oarlock blocks for Half-Shell(below).