
Wednesday, April 16, 2014
And the verdict is?
After a few days of deliberation, I have decided to scrap this season. I know, the season has not even started yet, but I don't have the time to get the boat fully stripped, painted, and re assembled. With that being the case, I will be moving the boat from its current location to my parent's house and building a bow shed so that I can work on the boat year-round and during inclement weather. This was a hard pill to swallow, but I think it is the right choice. Plus, then I can do the things I need to do correctly. I can pull all the deck hardware, do a proper job sealing all of the thru-deck holes, take time to do a proper rather than a rush paint job, and finally finish the interior. This is a restoration project, and since I have learned that everything takes longer than it takes, I am just going to accept that the boat is going to be on land for another season. Its a sad day, but I think it is for all the right reasons.
Tuesday, April 15, 2014
Survey says........
fuck........ I have so much to do, and should have had the boat surveyed at the beginning of my week, rather than at the end.
 This is how survey day started. I cut the corner a little bit backing into the driveway and sunk to the axles on the truck. I attempted to get myself unstuck by rocking the truck back and forth like you would in the snow, but I was way too stuck for that. Luckily my wonderful savior of a friend Josh had just left and was able to come back and pull me out with his 4 wheel drive pick up. My advise: Don't try to go mudding in a 2 wheel drive Tacoma, especially in reverse!
 The rig needs some attention also. Where the stays meet the mast, they are attached using thin gauge stainless plate steel. Because this holds all of the tension of the rig, the surveyor is concerned that due to the thin gauge, it is prone to failure. Also, the holes to accept the pins for the rig are not quite the right size (too big). This means that the pins will only be touching the bottom of the holes, and have the possibility of then only exerting pressure on the cotter pins holding the main rigging pins into place. That is not something that I want to have fail, because it means the whole rig will come crashing down. Even if no one were to get hurt in such an event, it would ruin your day, so it needs to get addressed.
Mudding?
The Survey
The Good:
There was good news and bad news from the survey. The good news is that the hull is in pretty good shape. There are a few places where the thru-hulls were not sealed properly, so water had gotten into the laminations of glass. This makes them weaker, and prone to failure. The surveyor told me that they were not bad, and I could sail as is this season, so long as I kept an eye on them. He also thought that the rudder was in excellent shape, as well as the bearings for the rudder post. In a look at my breaker panel, he was impressed with what I had accomplished so far, and thought I was doing a good job following the American Boat and Yacht Council (ABYC) standards for boat wiring. He also thought that I was making it unnecessarily complicated with too many functions, but that is minor. All in all, not bad for a boat bought without a survey!
The Bad:
The surveyor made me a list. First on the list is to cut up the floor in the cabin so that I have access to the entire length of the keel. This is not difficult, but it is a real necessity. If you hit bottom in Maine, it is probably granite, so you probably have hull damage. If you cannot get to the keel, especially the forward part of it, then you have absolutely no chance of stopping the water from coming in. Also, because the forward section of the keel is not accessible, there is no way to assess if the beams under the floor to transfer the loads from the mast and bulkheads to the keel are in good shape. If they are not, then I have some serious work to do.
The next item was safety equipment. I need fire extinguishers, VHF radio (he suggested handheld over boat mounted), hand held GPS, radar reflector (on the boat currently), and good quality comfortable PFDs (personal flotation devices, or life jackets) that can and will be worn when onboard. Most of this stuff I knew I had to get, but had not gotten to it yet.
In the outboard well, he suggested that I add a fire port to the small hatch facing forward into the cockpit. This is so that if the outboard catches fire, all I have to do is expose a hole that is big enough to fit the nozzle of a fire extinguisher into. That way the main hatch can stay closed, since opening it would allow a whole lot of oxygen to get to the fire, and probably cause an explosion. This way the whole locker can stay closed, and the fire extinguisher has the best possible hope of putting out the fire due to the enclosed space. A great recommendation that I fully intend to implement.
The rig needs some attention also. Where the stays meet the mast, they are attached using thin gauge stainless plate steel. Because this holds all of the tension of the rig, the surveyor is concerned that due to the thin gauge, it is prone to failure. Also, the holes to accept the pins for the rig are not quite the right size (too big). This means that the pins will only be touching the bottom of the holes, and have the possibility of then only exerting pressure on the cotter pins holding the main rigging pins into place. That is not something that I want to have fail, because it means the whole rig will come crashing down. Even if no one were to get hurt in such an event, it would ruin your day, so it needs to get addressed.
Now to the biggest of the issues. Boats of this age, according to the surveyor, do not rot from the bottom up, but rather from the top down. The deck fittings are old, and the bedding compound is probably suspect. When the bedding compound fails due to age, vibration/flexing, or sheer neglect, it allows water to trace down the bolts and bolt holes. This lets water into the deck, which has a wood core. That coring then rots, and the boat is junk or extremely expensive to fix. It also allows the water to get into the cabin and damage the cabinetry, bulkheads, and other support structures for the boat. This can also happen when the gel coat or paint on deck (or the hull) has cracked or failed. This is where the bad news comes in. I have to paint the entire boat. All of the paint is either bubbling, cracking, or has crazing (micro cracking). This means that there is no longer a barrier between the water and the deck/hull, possibly allowing the water to infiltrate the deck/hull without the need for holes in the deck. What this means for me is that I have to sand and paint the entire boat. The dilemma is this: do I do it correctly (pull all the fittings/hardware to paint under and rebed) or do I do a quick and dirty job to get in the water (tape off fittings and slap some paint on her)? The other concern is that I no longer have The Lady under cover. If I paint her, I need a windless, cloudy day to get the painting done. If I were to pull all the hardware, then I would also need to cover the boat again in order to prevent rain from pouring in all the now exposed holes. Pulling all the hardware would probably take 8-10 hours of work assuming it all comes off very easily. Then sanding the entire boat will take at least as long as pulling the hardware, but probably much longer. Then to paint the entire boat I would need another full day, assuming I can get it done in one coat. Bedding and reattaching all of the hardware would then take another day. So, if I were to do this correctly, it would take me at least a week, and would have to be perfect weather. If I tape everything off, it is still going to take me 3-4 days, again in perfect weather. I could build a bow shed (which I kind of want to do anyway, because they are gorgeous and interesting) but that adds expense and time, but would protect me from wind and weather. Also, when the boat comes out of the water, I would have a shelter to put it in for the winter.
In case you have not figured it out yet, I am having a dilemma. To add to it, my first kid is due in August, so I have written off sailing past August 1. With the amount of work left to do, I think it might just make more sense to build the bow shed and do the work right, rather than try to hurry and get it done, and have to do it again because it looks like poo. Plus, then I can change the hull color (navy blue would look really sharp) which I wanted to do anyway. Anyone have any thoughts?
I may have lied.
So I thought that I was going to get away without drilling any more holes in the bottom of the boat. I picked up my self-powered knot meter today, and have to drill another hole in the bottom of the boat to put the paddle wheel in. The most unfortunate part is that the thru-hull is plastic. I really do not want to use it, but to get a knot meter with a bronze thru-hull is prohibitively expensive. I tried to find a bronze thru-hull to replace the plastic one, but the paddle wheel does not fit in the bronze thru-hulls. (Edit: My dad and I may have come up with another solution so no hole needs to be drilled. More on that later.)
 When I was working on the rear hatch, I did not end up mixing enough catalyst into the resin. As a result, only the top of the hatch hardened. My solution, which turned out to only be sort of a solution, was to wrap the vertical edge of the hatch with more glass and resin in hopes that it would make the resin under it kick. It mostly did the trick, but where the hatch had been rounded on the edge, the resin was still sticky. Again I covered it with more glass and resin, and finally the hatch was ready.

When I did the first test fit on the rear hatch, it did not quite fit. I routed off a quarter inch from each of the short sides, and now the hatch fits like a glove. The picture to the left is the hatch in place before I trim it to accept the hinge on the back side. I will also be painting it so as to protect the hatch from the weather.

 Today, because it was such a beautiful day out, I was able to glass the new support for the main hatch. When I bought the boat, this was a mess. The glass had been broken in a number of places, and because it was broken the cabin top had little support. This meant that cabin top would flex a lot underfoot. While the boat is in the water, most likely the main hatch would be open, and I would be standing on that, rather than the cabin top. In any case, having the support back and glassed into place should make the cabin top stronger. I also took the opportunity to drill the holes for the hatch slide. This way I could fill them in with resin so that when they get redrilled for the screws, they will be sealed with resin.
 One of the things that I needed for the boat was a depth sounder (transducer). Because the Maine coast is primarily rock rather than sand/silt/soft stuff, running aground here is a real crisis. I grew up sailing on the Chesapeake Bay which is all silt/sand. When you run aground there, which we did often because the boat drew 6'8" of water, you took a swim break, ate lunch, and then tried to get off the bottom. This was because there was little risk of doing serious damage to the hull in a grounding in sand. The Maine coast is mostly granite, so if you hit an underwater ledge, you better head for somewhere close to pull your boat immediately from the water because more than likely you have a hole in your boat or failure of the keel to hull joint. Without a depth sounder, you have no idea how deep the water is, so have no clue as to when the bottom is coming up. I want to be prepared for this, so I installed the gauge, and routed a channel in the wood paneling to hide/support the wiring.

Another way that I am trying to be prepared is by having a good bilge set up. Even though I am reusing the bilge pump that came with the boat (tested and known to work), that is not good enough. I also have the manual pump installed so I can pump the bilge from either in the cabin of from on deck. To add to the safety of the system, I have added a high water alarm. The float switch will kick on an alarm (100dB or so) when the water inside gets to a certain level. This is an indication that there is a leak, and attention to the boat is needed. It is also set so that it will go off well before the water reaches the floor boards in the cabin. There is nothing like finding out your boat is taking on water like your floor boards floating.
 This is the breaker panel with the new addition of the bilge alarm speaker. I have yet to wire it up, but that is coming soon.
 While I was going to create another post for another day's work, I decided that why bother, when I had not even finished this post yet.
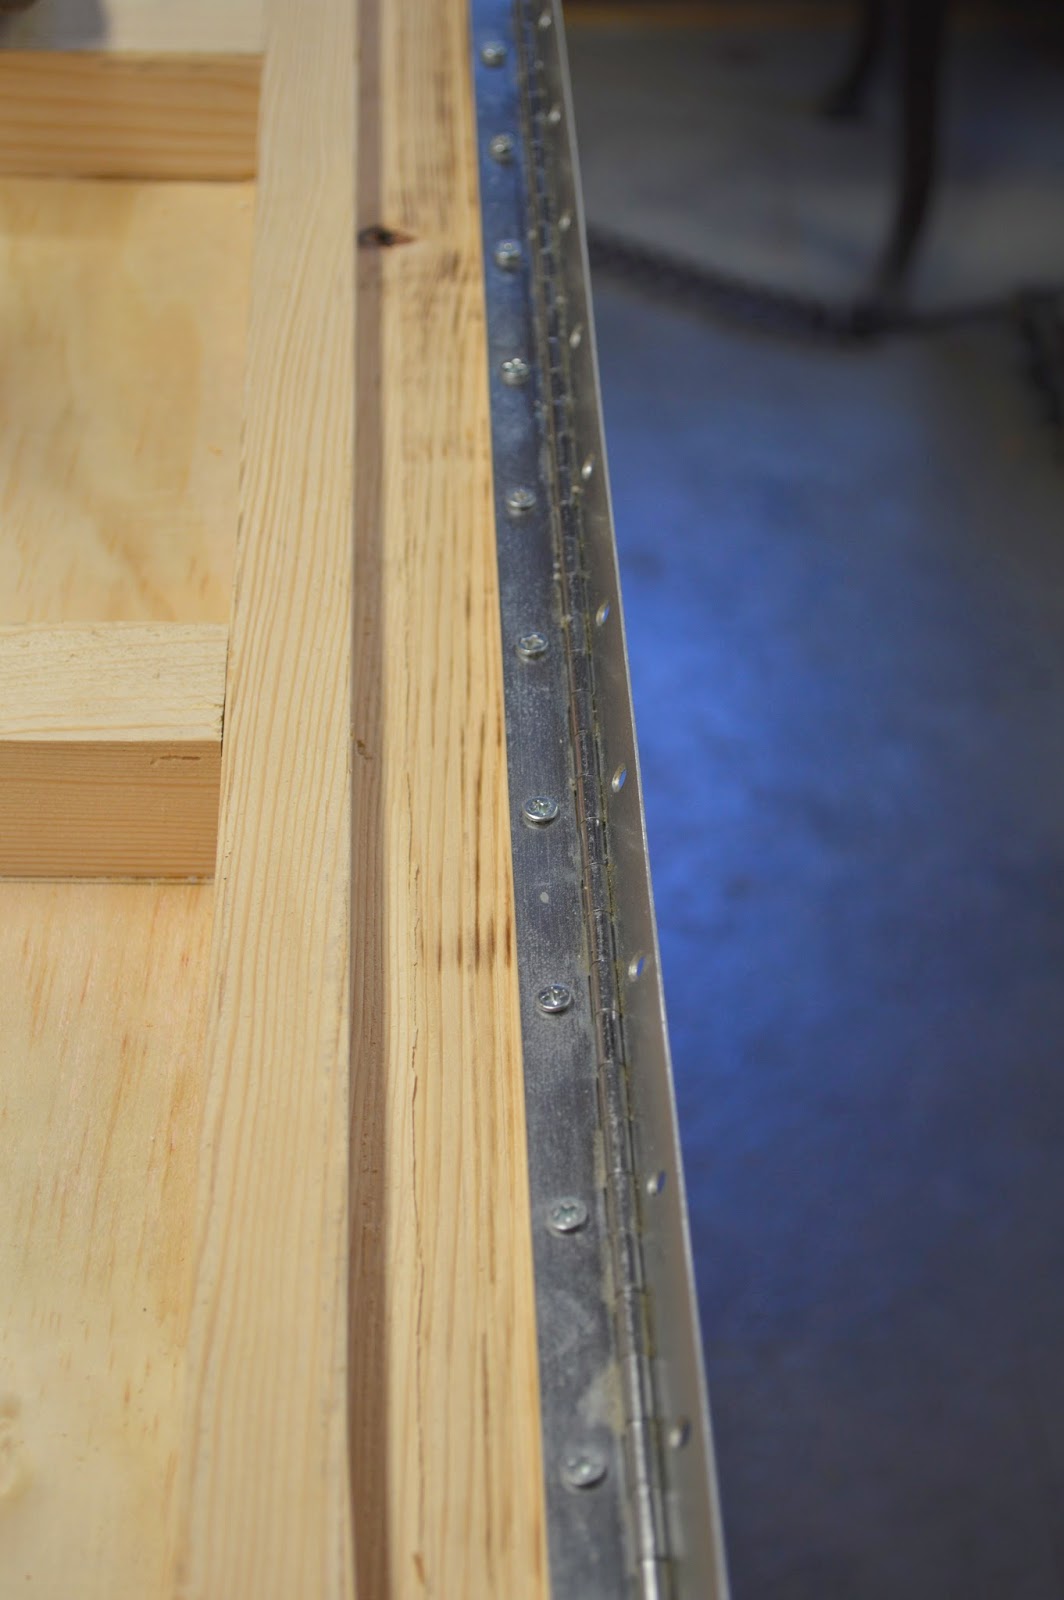
To the left is the rear lazarette hatch with the piano hinge in place. I spent a lot of time playing with my dad's router to make some of these little projects come together. Having access to a shop that has a lot of tools and someone with the knowledge to use them has been super beneficial to my boat project. Plus my dad just enjoys working on boat projects anyway.
 I spent a fair amount of time researching insulation this winter, probably because it was such a long, cold, gross winter. One of the many things that I discovered was that when doing solid insulation you should tape all of your seams to prevent airflow. I used aluminum tape, but then ran out. Since I was in a hurry, I finished with duct tape even though it is a poor choice. I will go back an fix it eventually.
 I have to give credit where credit is due: Thanks dad for crunching the numbers on this battery box and then cutting all the pieces. It made is so I could work on other projects in the meantime. This battery box is going to be fully glassed. Once that is done, it will be able to hold four 6v T-105 golf cart batteries. That leaves me a HUGE battery capacity, so I will probably start with only two 6v batteries, or maybe two 12v batteries. I am a little up in the air about this.
 The convertible chart table is almost done as well. The table will have 2 drawers, and the whole thing will be supported on the fold out arms, as well as being bolted to the trim piece that it sits on. There may also be a support block to hold the outboard corner. We will see though.
I feel like I got so much accomplished this week while I was off of work. I have been scrambling to get as much done as possible before the surveyor comes to look at the boat. What I am really hoping is that he does not do his survey and tell me that the boat is a catastrophic failure. It would be devastating, both to my moral but also to the dream of owning an ocean capable boat. We shall see how I did buying the boat basically sight-unseen.
Glass Work
When I was working on the rear hatch, I did not end up mixing enough catalyst into the resin. As a result, only the top of the hatch hardened. My solution, which turned out to only be sort of a solution, was to wrap the vertical edge of the hatch with more glass and resin in hopes that it would make the resin under it kick. It mostly did the trick, but where the hatch had been rounded on the edge, the resin was still sticky. Again I covered it with more glass and resin, and finally the hatch was ready. When I did the first test fit on the rear hatch, it did not quite fit. I routed off a quarter inch from each of the short sides, and now the hatch fits like a glove. The picture to the left is the hatch in place before I trim it to accept the hinge on the back side. I will also be painting it so as to protect the hatch from the weather.
Today, because it was such a beautiful day out, I was able to glass the new support for the main hatch. When I bought the boat, this was a mess. The glass had been broken in a number of places, and because it was broken the cabin top had little support. This meant that cabin top would flex a lot underfoot. While the boat is in the water, most likely the main hatch would be open, and I would be standing on that, rather than the cabin top. In any case, having the support back and glassed into place should make the cabin top stronger. I also took the opportunity to drill the holes for the hatch slide. This way I could fill them in with resin so that when they get redrilled for the screws, they will be sealed with resin. Other Work
One of the things that I needed for the boat was a depth sounder (transducer). Because the Maine coast is primarily rock rather than sand/silt/soft stuff, running aground here is a real crisis. I grew up sailing on the Chesapeake Bay which is all silt/sand. When you run aground there, which we did often because the boat drew 6'8" of water, you took a swim break, ate lunch, and then tried to get off the bottom. This was because there was little risk of doing serious damage to the hull in a grounding in sand. The Maine coast is mostly granite, so if you hit an underwater ledge, you better head for somewhere close to pull your boat immediately from the water because more than likely you have a hole in your boat or failure of the keel to hull joint. Without a depth sounder, you have no idea how deep the water is, so have no clue as to when the bottom is coming up. I want to be prepared for this, so I installed the gauge, and routed a channel in the wood paneling to hide/support the wiring.Another way that I am trying to be prepared is by having a good bilge set up. Even though I am reusing the bilge pump that came with the boat (tested and known to work), that is not good enough. I also have the manual pump installed so I can pump the bilge from either in the cabin of from on deck. To add to the safety of the system, I have added a high water alarm. The float switch will kick on an alarm (100dB or so) when the water inside gets to a certain level. This is an indication that there is a leak, and attention to the boat is needed. It is also set so that it will go off well before the water reaches the floor boards in the cabin. There is nothing like finding out your boat is taking on water like your floor boards floating.
More Work, Same Post
While I was going to create another post for another day's work, I decided that why bother, when I had not even finished this post yet. To the left is the rear lazarette hatch with the piano hinge in place. I spent a lot of time playing with my dad's router to make some of these little projects come together. Having access to a shop that has a lot of tools and someone with the knowledge to use them has been super beneficial to my boat project. Plus my dad just enjoys working on boat projects anyway.
I feel like I got so much accomplished this week while I was off of work. I have been scrambling to get as much done as possible before the surveyor comes to look at the boat. What I am really hoping is that he does not do his survey and tell me that the boat is a catastrophic failure. It would be devastating, both to my moral but also to the dream of owning an ocean capable boat. We shall see how I did buying the boat basically sight-unseen.
Wednesday, April 9, 2014
Something is finally hatching....
 In the last two days of work, I have built a hatch in a very beefy manner, as well as get a transducer for the boat and get the boat registered for the summer.
  The aft hatch to cover the outboard well is of similar construction to the fore deck hatch, in that it is of very sturdy construction. The idea is that this hatch may have to take the weight and forces of breaking water over the stern deck, also known as "being pooped." While the aft locker is open to the water because the outboard goes through the hull, the water would drain relatively quickly, but 50+ gallons of water at one extreme end of the boat for any length of time in seas rough enough to poop the boat is not a recipe for success. The other idea behind making an extremely sturdy hatch is that it might help to prevent someone from stealing my outboard motor when locked down.
 When I decided to round the edges of the hatch, instead of using a belt sander to do the majority of the work, I opted for a draw plane. Yes, it is very old fashioned, but there is something really satisfying about using hand tools that are sharp and do the job. When we live in a world where everything is powered, from our transportation to our tooth brushes, having an old fashioned way to do the same job is refreshing. Even though I finished the sanding of the piece with the belt sander, I felt a lot more satisfaction knowing that it was my eye and steady (or not so steady) hands that shaped the wood before getting a final sanding. It probably also helps that I had a really good idea of how the construction would go, so I could take a little extra time to do things the old fashioned way.
 What is upcoming that I have NO idea how it is going to go is putting the transducer in. I want to do an in hull transducer, rather than a thru-hull transducer. This means that I will NOT be drilling another hole in the bottom of the boat (shocking, I know), but rather building a box or pipe for the transducer to be mounted in within the hull. It will then be filled with water/oil/antifreeze and the sound waves beamed right through the fiberglass hull. This eliminates yet another thru-hull, which is especially good, since bronze transducers are BIG money, and plastic ones for an ocean bound vessel are fool hardy, particularly below water line. The down side is that I will lose some of the deep sensing capabilities, but when the water is several hundred feet deep, I don't really need to know how deep. The depth I need to know is when it is approaching 4 feet, because that is when keel meets granite. If you're not familiar with granite, granite is not what would give in that meeting.
Monday, April 7, 2014
Spring is finally here....
.... so I am in a race to the finish to get my boat wired, finished, and ready to go in the water!
To start, I went to the Portland Boat Builder's show again this year. I was somewhat disappointed with the turn out by vendors, but was still quite happy to walk around and see all the shiny new things, as well as some beautiful old things as well. While most of the vendors I had talked to last year, there were a few new ones that I had not seen.
 I am pretty sure this artist was not here last year. The birch bark over wood frame canoe that he built (left) was absolutely stunning! I overheard him telling someone about how all of the seams are sealed, how the bark gets treated, and the number of hours that went into the boat. While I would never buy a canoe like this, i can certainly appreciate the craftsmanship and hundreds of hours that go into a project on this scale and detail.
 The level of craftsmanship was not just limited to the boat builders. This vendor was working in composites, and had a number of creations on display. This trunk top was one, with the compass rose done all in carbon fiber in the original molding of the piece. They also had a full carbon fiber cello that someone had commissioned them to make. What a stunning instrument it was too. Absolutely flawless. I only wish they had someone there playing it.
 This winter, since it has been a long and cold one, I have been looking into electric propulsion. Mostly I have been looking at people building DIY electric cars, motorcycles, and go carts. I had forgotten about electric propulsion for boats. I was reminded today of talking with a number of vendors at last year's boat show about electric propulsion, and that I was interested, but it was not the time for me to invest in the tech, as I had to get Lady Lucile ready for the water before beginning to try to be a relatively early adopter for all electric propulsion. When I saw this boat (photo right) at the boat show, I was impressed by their "sail drive". While I did not get the details about this, I am pretty sure the electric motor is in the pod with the propeller. While this would make maintenance of the motor hard if there was a problem, I still find it to be a very neat set up.
 I've been very lucky to have a dad that loves projects, and more importantly boats, as much as I do! Because my knowledge of electronics and wiring are limited (but ever expanding), I have been relying on my dad for a lot of advice and straight up help. He always seems to have an answer, or at least is willing to go look for one when he doesn't. I only hope I can be as great a dad as my dad is to me!

Before we get into the wiring of the boat, I finally got the new main sheet block set up and ready for use. I also got the quick release hook set up for recovery operations, although I hope to never have to use the main block for that purpose. I think because I have grown up as a sailor, and spent my life around a lot of sailors, I know how valuable it is to be prepared, to think outside the box, and be prepared to wing it when all your plans to go shit. With plans to sail a lot this summer, and to teach my girlfriend to sail my boat, I need a system for her to bring me back onto the boat should I become incapacitated in the water. While I have not worked out the flaws in this system (aka- still an untested system) at least I am working on something.
 Some of you my remember the home brew AC electrical system that was on the boat when I bought it. It is gone now. However, when I was tearing out junction boxes connected by extension cords, I noticed that some of the 12v DC wiring was of dubious quality also. Note left that the wires are connected with wire nuts (the black things). While this is okay for home wiring, this is just asking for trouble in marine wiring. Not only is it an invitation for corrosion, but it is also an invitation for sparks, which lead to explosions if you have a gasoline inboard engine.

Fortunately, this particular boat does not because I knew from looking around that most all of the boat of this vintage need new engines. To protect the boat from explosion hazards, as well as corrosion of the electrical system, I opted to maybe go a little beyond what is required and use crimp connectors with heat shrink, adhesive lined tubing (the blue things, left). The adhesive in the shrink tubing seals the connections from the outside world, so it makes it very difficult for corrosion to take place. Hopefully this wiring job will last another 50 years for this boat! Unfortunately, there is still much wiring to be done inside the boat, which will hopefully be fully (or mostly) done by weeks end.
 Probably the most important job to be done was to get the mast rewired and the lights replaced before the rig is put up. The lights on the mast were both broken, with the steaming light (the light used for navigation when the boat is under engine power, rather than under sail, right) had been repaired with a screw on bottle cap. While I appreciate the ingenuity and resourcefulness, I decided to get a new steaming light (black unit, far right) that has a fore-deck light built in. This meant running new wiring (triplex), although I was going to run new wiring anyway, because I did not want to get the mast up and rigged only to find out that the wiring was bad, and the lights did not work, meaning either the rig would have to come back down, or I would have to go up the mast to run the new wires. Neither option really seemed like a good idea, so rewire the mast dad and I did.

We also rewired the anchor light (or mast head light). There was no lens left on the previous unit, and it was a chance to upgrade to an LED unit to conserve some power. There is a little controversy about LED lights and if they are as visible as incandesent light bulbs, but I figure if the US Coast Guard has approved them for 2 mile visual range, then they must be just fine.
 Originally the mast also had a coax cable run for the VHF radio. It was in terrible condition, so it was also removed from the mast. While I do not have any coax cable to go in for a replacement yet, I do have a runner (aka- a string) in place to pull the new cable through when I get it and a new antenna. The old antenna looked to be in great shape until I accidentally dropped an anchor on it and the fiberglass shattered into many many pieces. I will be buying a metal whip antenna to replace the shattered one. Of note also in the picture to the right is the loop of wire at the top. I though it might be prudent to have extra wire at the top of the mast should I decide I want to replace the mast head light at some juncture down the road, and have to cut away the old light.
 This week I will be working to get the breaker panel mounted and wired, build the 5th and final hatch for the rear lazarette, re-register the boat, as well as get the chart table finished and mountable. I am hoping to get all of this done, but I have been at this project long enough to know that these projects take a lot longer than I want them to. Take wiring the mast for example: with two of us working, it took us all day to run 2 wires and a runner for the coax. Obviously we ran into snags that we were not anticipating, as well as problems that could have been avoided had we done a bit of measuring before fully diving into the project. Sometimes in your eagerness to get started on the project, you forget some of the basic things that can really save you headaches down the road.
The plan for next week is to get the boat surveyed so that I can finally get insurance, and get the boat in the water for the first weekend in May! This year, no dirt bikes til the boat is in the water!!!!!
Portland Boat Builder's Show 2014
To start, I went to the Portland Boat Builder's show again this year. I was somewhat disappointed with the turn out by vendors, but was still quite happy to walk around and see all the shiny new things, as well as some beautiful old things as well. While most of the vendors I had talked to last year, there were a few new ones that I had not seen.
Weekend Work
Before we get into the wiring of the boat, I finally got the new main sheet block set up and ready for use. I also got the quick release hook set up for recovery operations, although I hope to never have to use the main block for that purpose. I think because I have grown up as a sailor, and spent my life around a lot of sailors, I know how valuable it is to be prepared, to think outside the box, and be prepared to wing it when all your plans to go shit. With plans to sail a lot this summer, and to teach my girlfriend to sail my boat, I need a system for her to bring me back onto the boat should I become incapacitated in the water. While I have not worked out the flaws in this system (aka- still an untested system) at least I am working on something.
Wiring!
Fortunately, this particular boat does not because I knew from looking around that most all of the boat of this vintage need new engines. To protect the boat from explosion hazards, as well as corrosion of the electrical system, I opted to maybe go a little beyond what is required and use crimp connectors with heat shrink, adhesive lined tubing (the blue things, left). The adhesive in the shrink tubing seals the connections from the outside world, so it makes it very difficult for corrosion to take place. Hopefully this wiring job will last another 50 years for this boat! Unfortunately, there is still much wiring to be done inside the boat, which will hopefully be fully (or mostly) done by weeks end.
Probably the most important job to be done was to get the mast rewired and the lights replaced before the rig is put up. The lights on the mast were both broken, with the steaming light (the light used for navigation when the boat is under engine power, rather than under sail, right) had been repaired with a screw on bottle cap. While I appreciate the ingenuity and resourcefulness, I decided to get a new steaming light (black unit, far right) that has a fore-deck light built in. This meant running new wiring (triplex), although I was going to run new wiring anyway, because I did not want to get the mast up and rigged only to find out that the wiring was bad, and the lights did not work, meaning either the rig would have to come back down, or I would have to go up the mast to run the new wires. Neither option really seemed like a good idea, so rewire the mast dad and I did. We also rewired the anchor light (or mast head light). There was no lens left on the previous unit, and it was a chance to upgrade to an LED unit to conserve some power. There is a little controversy about LED lights and if they are as visible as incandesent light bulbs, but I figure if the US Coast Guard has approved them for 2 mile visual range, then they must be just fine.
Originally the mast also had a coax cable run for the VHF radio. It was in terrible condition, so it was also removed from the mast. While I do not have any coax cable to go in for a replacement yet, I do have a runner (aka- a string) in place to pull the new cable through when I get it and a new antenna. The old antenna looked to be in great shape until I accidentally dropped an anchor on it and the fiberglass shattered into many many pieces. I will be buying a metal whip antenna to replace the shattered one. Of note also in the picture to the right is the loop of wire at the top. I though it might be prudent to have extra wire at the top of the mast should I decide I want to replace the mast head light at some juncture down the road, and have to cut away the old light.The Plan of Attack
This week I will be working to get the breaker panel mounted and wired, build the 5th and final hatch for the rear lazarette, re-register the boat, as well as get the chart table finished and mountable. I am hoping to get all of this done, but I have been at this project long enough to know that these projects take a lot longer than I want them to. Take wiring the mast for example: with two of us working, it took us all day to run 2 wires and a runner for the coax. Obviously we ran into snags that we were not anticipating, as well as problems that could have been avoided had we done a bit of measuring before fully diving into the project. Sometimes in your eagerness to get started on the project, you forget some of the basic things that can really save you headaches down the road. The plan for next week is to get the boat surveyed so that I can finally get insurance, and get the boat in the water for the first weekend in May! This year, no dirt bikes til the boat is in the water!!!!!
Subscribe to:
Posts (Atom)