Sunday, November 3, 2013

More Construction!!!

So I spent a fair amount of my week of my week off from work thinking about my project and looking through electronics like Navigation lights, VHF radios, depth sounders, knot meters, etc.  The trend in the nautical world is to network everything together and rely on that networked system for all of your information for navigation.  I think this is silly, and would rather keep everything as simple as possible.  When people only rely on the GPS rather than using their eyes, it can lead to running their boats aground, or worse, run them to their death.  Things like solar flares and sun spots can throw off the GPS as much as several hundred feet.  When you are used to making a passage within several hundred feet of an offshore obstacle, with your GPS telling you that you are in one place, when the reality is you are not where you GPS is showing.  With that as a possibility, I would rather rely on dead reckoning, piloting, and navigation skills.


Since I feel the need to have a chart table, as well as retain the original 4 bunks in the boat, I have come up with a convertible chart table idea that is finally moving into the building faze.  I am also working on relocating the fuse panels to a location where they are accessible, rather than at the front of the boat where they were from the original owner/manufacturer.

The fuse panel will be hinged so that when electrical gadgets want to be added or removed, it will be easy to access them.  Also, there will be bookshelves going in next to the fuse panel to hold all of my nautical information.  This refit has made the bunk narrower, but it will make a great sea bunk because it is narrow.  The catch 22 of that is this: when you are at sea, probably going to have the chart table up for navigation, rendering the bunk useless for sleeping (unless you are a small child).

Originally I was going to raise the bunk 9 inches to the level of a proper seat for the chart table, but realized that going to that extreme of customization would make the boat less appealing for resale.  Instead I decided to make a box to sit on, but my sister made a great recommendation for the seat.  I am going to make a fold away seat that is mounted under the fuse panels.  I think it is a better solution to the seating problem, as it just folds up out of the way, rather than having to stow a box somewhere.

It feels good to be moving along.  The next major project is rebuilding the mast support, but I do not have any information on what the beam is made from, nor the best way to get it out and replace it with another one.  What makes it tricky is the one piece headliner that was obviously put in before the deck and mast support were put on.  If anyone  has information regarding this problem, I would greatly appreciate the help!

Thursday, October 24, 2013

This is a HUGE step in the right direction!

Reconstruction has begun in earnest.  As you saw in previous posts, I ripped the old, rotten bunk out of the boat.  This week I have been working on rebuilding it with the new convertible chart table modification.
Originally I was going to raise the bunk about 6 inches to give a good seating position for the chart table, but after doing measurements realized that I needed to raise it 9 inches.  No, I didn't look at my notes upside-down!  I then realized that this boat is probably not going to be the last boat that I own, and more importantly, even though it could be a seriously capable offshore cruiser, most of the boating population will never lose sight of land.  Therefore it makes many of the major upgrades for offshore cruising unnecessary or even useless to the casual sailor.  Even though upgrading the boat to offshore capability puts the boat on a much higher level of safety, I would never see the pay back.  It makes more money sense to leave the boat as close to stock as I can.  Obviously I am making a few changes, but I think that even for the casual cruiser they are positives!

Because I am trying to leave the boat as close to original as I can, I had to come up with another idea for the bunk.  The bunk is going to remain at the original height.  With the chart table up, it will put it at about neck level for me, and I am 6'1" tall.  Therefore I need a box to sit on.  I think that I can build one that will fit under the convertible bunk so that when not in use, it is storage.  Then when you want to use the chart table, lift it up into position, and pull the box out and put it on the bunk.  It seems like a really simple fix to a not so easy to explain idea.


I am so excited to be building rather than ripping out old, rotten wood, or removing old, dubious quality installations done by the previous owner.  There is such a contrast in the plywood (Russian, 5 ply Birch) that the bunk is being built out of when compared to the rest of the boat that has aged somewhat poorly.  Like with most thing, a coat of paint is going to go a long way to make things look better in the cabin, but it is still really surprising to see the contrast.


I ended up going with the Russian Birch plywood because I needed something that was as close to on par with marine grade plywood, but didn't want to pay something close to $100 per sheet.  The other consideration was that the bunk is not a structural piece of the boat, like the main bulkhead was.  Therefore I think I can get away with a slightly lesser quality ply to get the job done.  Plus, it is going to be painted with oil based paint and in the cabin, so it should not have water issues.

 Since I desire storage under the bunk, rather than just wasting the space, I had to put in a top loading hatch.  It was cut from the bunk.  Once the hatch piece was out, I went on the glue and screw in tabs for the hatch to sit on.  This means that the hatch will be supported around its entire perimeter, which makes the hatch able to support the weight of a sleeping person, as well as make the bunk more structurally sound overall.  The hatch was oversized, as it makes loading and unloading much easier.  It also allows bigger items to go under the bunk.  In the true fashion of this build, I am going to try to reuse the old bunk hatch covers for the floor area under the bunk.  It I think will add some interest, and maybe even a little storage for small things underneath.  We will see if this actually pans out, but it is the idea of the moment.

All in all, I am very happy to be back to working on the boat, and pleased with the progress I am making.  This coming week should provide me ample time to get things done, as I am on vacation from work all week.  I am looking forward to more building!


Thursday, October 17, 2013

A Chat with Geoff Trott about the "AirHead" Composting Toilet!

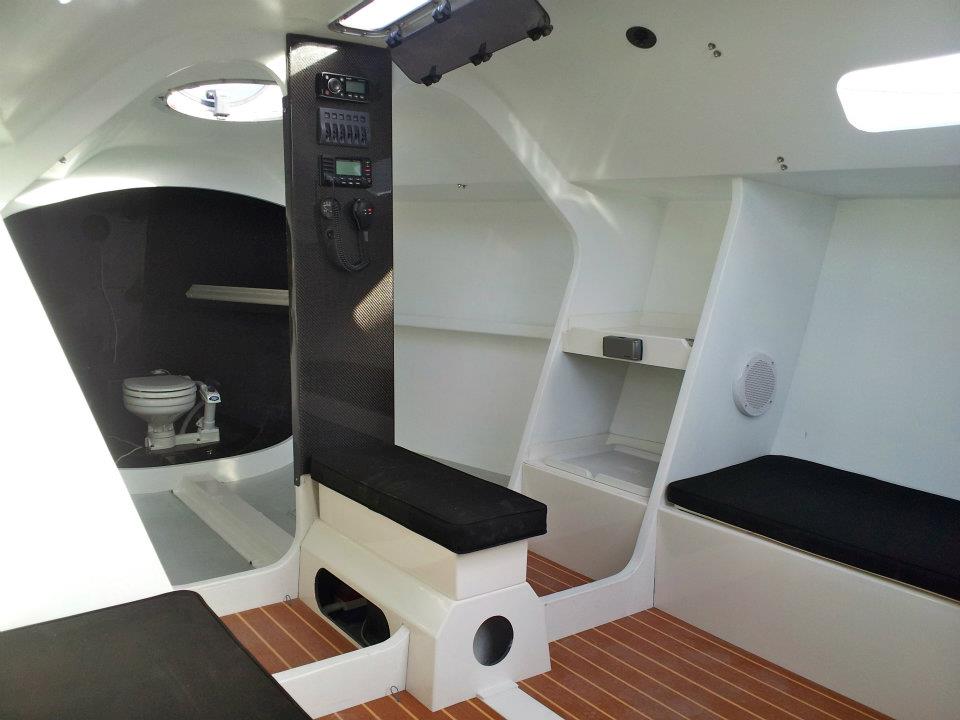
I had the opportunity to sit down with Geoff Trott, the general manager of Eos Design LLC , manufacturer of  “Air Head” Composting Toilets.  I was not really sure what to expect when interviewing someone for the first time, let alone someone who makes something that I know so little about.  First, here is a summary of the “Air Head”, but more information can be found at www.airheadtoilet.com .  The “Air Head” is a composting toilet for boats.  While traditional marine heads (toilets) flush in some manner or another (auto vs. manual pump) and have holding tanks for all of the waste, the Airhead is a single unit that fits where your traditional marine head would go and skips the extra holding tanks.  This is important, especially on a boat as small as mine, because those holding tanks take up a lot of room.  The compact design makes it good for RV’s and Tiny Homes (tinyhouseblog.com) with limited space or septic hookup.  The space consideration was something that helped to lead Geoff to develop the Airhead.
Geoff is a really interesting guy to talk to.  While this was an interview, it felt a lot more like two old friends catching up after 10 years on their current projects, even though this was the first time I met Geoff.  Geoff has been sailing since he was 16.  He did some J24 racing when he was living in Connecticut, and has had the dream of living on a boat for years.  Geoff is an engineer by training.  When he left college, he wanted to help people, so went into corporate pharmaceuticals.  After working for a while and having all the trappings of a corporate job, he realized that his life was missing something.  This led him to leave the corporate world and buy a boat to live on.  His first boat was a Wauquiez Centurion 32.  This might seem like an insignificant detail, but this boat led Geoff to develop the Airhead.  When he bought the boat, it did not have a head or holding tanks.  The reason for the lack of holding tanks was because it was a European designed boat and overboard discharge even into the 90’s was the norm.  The US was actually ahead of the curve on no-discharge rules.  To comply with US regulations, Geoff bought a porta-potty to use.  He would empty it about once a week, but found that it was difficult, messy, and the marinas were disinclined to let him empty the porta-potty in their bathrooms.  He also couldn’t pump out the porta-potty at the pump-out station because it was not designed for it.  With all of this frustration, Geoff started to think about different options.  If he put in a 10 gallon holding tank with a traditional marine head, he would get 10 flushes and then have to pump out the tank.  This was highly impractical.  Then his thoughts turned to composting toilets.
Conventional wisdom in the 90’s for composting toilets was that you needed a large mass of biomass to compost.  Therefore conventional composting toilets were quite large, too large for most boats.  Additionally conventional  composting toilets also created strong odors at the vent exit.  This is where Geoff’s innovation came in.  Composting toilets generally do not separate solids from liquids.  When thinking about this, he thought about how animal poo does not smell once it dries out.  If he could figure out a way to dry the solids, maybe he could get rid of the smell.  He decided the easiest way to go about it was to just separate the liquids and solids when going into the toilet.  In all of the research he did, it didn’t seem like it was going to work.  Not to be deterred from his project, he made a prototype and started to use it to see if the proof of concept worked.  Once he figured out that he needed a constant airflow through the solid’s tank, the smell of the composting toilet was pretty much all gone,  This turned out to be a great solution to his boat with no real space for the traditional marine head.
When I asked Geoff if he made the head only as a space saving device, or, if it had an environmental component as well, he told me that it was both considerations.  He had been interested in environmentally conscious technologies such as composting toilets and alternative energy, such as wind and solar.  This interest developed from a love of the outdoors and concern about where the world is going.  “I made a personal observation from 20 years of revisiting  a pristine wilderness (Lake Colden, Adirondacks), and seeing the change due to  human impact in this remote place.  For even in these preserves with only foot traffic from people who generally care about the environment, the local ecosystem seemed to be stressed.  Imagine human impact at a larger scale and how that might effect our world”.   He believes in “carry in carry out” hiking and camping and sees waste disposal as something that needs to be addressed on a larger scale.  As a surfer, he takes issues with cities dumping sewage overflow straight into the ocean.  This not only affects him as a surfer, but it also contaminates beaches near the out flows, as well as shellfish that get harvested nearby.  This certainly does not seem to affect the people who swim at the East End Beach in Portland.  If, by using an “Air head”, it takes waste out of circulation, the removal of waste is a win in Geoff’s book.  It also complies with no discharge rules in US waters.  This is a plus to beach goers, surfers, marine wildlife, and pleasure boaters.
One of the other components of environmentalism that is present in this product is that it is made in the USA.  This means there is less transport involved in getting the parts for final assembly, meaning that the toilet has a smaller carbon foot print.  Also, by being made in the US, the quality control is better, and it creates jobs here in the States.  This does get reflected in the price, but it appears that you get what you pay for.  A competitor’s product ( Natures Head, which is an obvious copy of the “Air Head”), had  seams between parts that did not meet, and had design flaws because it made opening and emptying nearly impossible in confined spaces. In general it is a not so well thought out head.  For $125 less, it does not look like the money saved is worth the hassle.*


         I also talked about Geoff’s 40’ Pilothouse sloop project.  The boat is a Radovich designed boat with a fiberglass hull and wood deck.  It was built and sailed primarily in California, but was then trucked to Lake Champlain.  With the exception of the deck and deck support structure, the boat is in quite good shape.   The deck was pretty much a total loss.  It was plywood with teak screwed into it.  The joinery between the teak pieces and the fact that it had been screwed directly into the plywood made the plywood sub flooring fail from the infiltration of water.  This then led to leaking into the cabin and ruining bulkheads.  The support beams were another story all together.  They had been laminated pieces, but instead of being laminated vertically, they had been laminated horizontally.  This gave them little strength, which meant that when stepped on they flexed downward underfoot.  If that was not bad enough, when the boat had been wired, they drilled holes in the cross beams to allow the wiring to be run fore and aft, thus creating weak spots in the already weak frames.  On top of all of this, some of the supports were eaten away by termites.  This is quite the project he has for himself, but judging by his eye for quality control on his Airheads, the sloop is going to be gorgeous when finished.
Before I went to do this interview, I asked friends on Facebook what they would want to ask someone who makes composting toilets.  The best question I got in response was this: If it is a composting toilet, what does your dog drink?  Geoff laughed when I asked him, and thought about it.  He recalled that he had a dog when he was in the development and testing phase, and that the dog did not even seem to notice the Airhead, so never developed the bad habit of drinking from the toilet.
All in all, it was a great experience to go and chat with Geoff about his product, project, and life aboard boats.  I want to thank Geoff for taking the time to show me the shop, interview him, and write about him during his peak busy season.  I certainly hope to run into him this summer when I am out on Casco Bay.

*This all based on evaluating one unit of theirs that I have seen and is my opinion.

Note: This interview was conducted and written in the summer.  My apologies for taking so long to get it out to all of you hungry readers!  


If you want more information, please check out the Airhead website!


Sunday, August 18, 2013

To destroy or not to destroy, that is the question.

It is more simultaneous destruction and reconstruction than destroy or not to destroy.  The port bunk in the main cabin is out, and the shelf behind the head is built and installed.  It used to be a salt water sink, but I saw no use for it there, as there is the galley sink that you can almost reach while sitting on the head.  The space looked more suited for storage than a second sink.  Plus, I am going to be installing a salt water pump for the galley sink.  The port icebox also came out while I was in deconstruction mode, as the drain from the icebox fell apart in my hand when I tried to take the drain hose off.  It also means that I can try to better insulate the box while it is apart.


Thursday, August 15, 2013

Since she's not going in the water yet......

I decided to get into some bigger projects.  You will have to pardon the crap-tastic photo quality, as I forgot my camera and needed to use my phone camera instead.  What I tackled first today was painting.  Yes, never ending painting.  If painting had junk, I would kick him in it.  I am so tired of painting, but there is still so much to do.  I know, I know, it was a horrible choice to paint the interior of my boat white, but on the other hand, I can see the bottom of the bilge, to the back of hanging lockers, and into the bottom of under bunk storage.  The other thing is, I am using oil based industrial machine coatings, which are designed to take serious amount of abuse and still hold up nicely.  Some might say that I am not keeping with the spirit of boating by not using boat specific coatings.  If I had the money to spend, I would (maybe), but the reality of it is this: the oil based paint that I am using is pretty much the same stuff I can buy at the marine hardware store for twice the price.  No thanks!  Plus, I am only through doing the V-berth, the main bulkhead, and two hanging lockers.  I still have the majority of the main cabin to do once I rebuild the port bunk.

What a segue.  I started to deconstruct the port bunk today.  I was going to just try to rip it bodily out of the boat, but then thought better of it.  There was quite a bit of hardware that would be re-useable if I was careful, and if my rebuild plans did not work out, I could always re-install the old pieces of the cabinetry.  I don't see that as a likely outcome, but we will see.  If I do not throw it away now, then I will not need it later.

The deconstruction process was somewhat interesting to me, because I kept uncovering old paint.  I believe that the current incarnation of the cabinetry is not original, or at least not entirely.  I found this large patch of baby blue paint under the wood working that had been removed.  I think this is the original coloring of the boat, as I have found blue gel coat in holes I have drilled in the hull.  I am glad the boat isn't baby blue any more.  I don't find it to be a fitting color for a proper boat.  In any case, it is interesting to me to uncover what others have done to the boat during its life.  I'm sure the person that this boat passes to after me will wonder what I was thinking when doing my redesigns.  It is inevitable.

I also busted into the main hatch rail today.  I was appalled to find out the the rail was surrounded by filler and only glassed over with ONE, yes ONE layer of glass fabric.  There is no doubt in my mind that this is why it failed.  There is so little strength in one layer of glass.  I would have thought that it was going to be all glass, rather than almost no glass.  This boat is from the era of fiberglass when they did not know that they could make things rather thin and still get good strength out of them.  This was when hulls were made inches thick, rather than millimeters thick.   The boats from this era are tanks.  They can take a serious beating because they are so over-engineered.  ONE layer of glass for the hatch rail is amazing with the previous information in mind.  Thankfully the rail is on top of the cabin top, and not connected through to the liner inside.  This means that the rail does not leak into the cabin, so I do not have to be worried about it until I can fix it.  Unfortunately I broke the wood stringer that was inside the rail, so I am going to have to make another to fill its spot, but I am not too worried about this, as I am going to glass the crap out of it so it does not go anywhere.  The original stringer was also severely water logged from being open to the elements and not enough so to dry between rain storms.

Also, I have been thinking about this project recently, and how I got pushed over the edge to get started on it.  I have to extend a huge thank you to my friend Jonathan and his friends/fellow crew on Out of the Blue.  They came down last fall from Canada to race in a qualifier for J/24 Worlds, and we hung out afterwards.  They all told me that if I was thinking about doing this, NOW was the time, as I did not have any major commitments.  A few of the guys even mentioned that they wished they could be back to when they were my age so they could do it themselves.  This group of guys were the final push to get me going on this project, and I am so thankful to them for doing it!  I have been having a blast with the project, and do not think that I would have actually done it otherwise.  It would have just stayed a dream, rather than becoming a reality.  Thank you again guys!!!!


Sunday, August 11, 2013

Columbia Carbon 32

So I have been trolling around the net today reading Practical Sailor articles (very very informative, BTW) and in general just trying to find more info on the projects I have coming up.  I came across the newest incarnation of Columbia Yachts and their boat the Carbon 32.  It is a full carbon-fiber race boat with only the absolute essentials for multi-day races.  I thought that my boat had a Spartan interior, but after a look at this racer, I have come to the conclusion that my boat is like a house in the Hamptons.  It may not be fast, but it certainly has all the amenities.

Having raced myself, I know what it means to have a no compromises sailboat at your command.  It is fast, exciting, and sometimes a little scary, but you don't care because you're too busy trimming, watching the wind, watching your competitors, giving orders to your crew, not to mention being focused on winning.  Do I think that the Carbon 32 would be a blast to sail?  Absolutely!!!  Would I want to live with it on a daily basis or sail it for pleasure?  Doubtful.  The reason is this: weight.  This boat is 6 feet longer than my C-26 so it would be logical to think that it weighs more.  WRONG!  The Carbon 32 weighs in at 4000 pounds. That is almost 1500 pounds lighter than the C-26.  Yes, weight is detrimental to speed, but weight makes for a more kindly sea-motion when beating to windward.  The C-26 can run a full main sail and a 150 genoa in 25 knots of breeze and be relatively upright to windward.  That means it can carry full sail during a small craft advisory warning.  I very much doubt that the Carbon 32 could even approach that kind of sail carrying capacity.  It certainly would not be even remotely comfortable doing so if it could.  

The other issue with super light weight racers, as I found out from a boat delivery captain, is that they are like a cork floating on the ocean.  They bob and pitch on every imperfection on the ocean's surface because they don't have the mass to punch through.  In some cases, this makes them slower than a traditional boat because the traditional boat doesn't waste energy bobbing and pitching, but rather just transferring power from the sails into forward motion.

I have no issue with the Carbon 32.  I would love to get the chance to sail/race one.  I also think that my life has changed to where I am not really as interested in the no-holds-barred racers, but rather a sensible, well found boat.  Also, racers do not really make for good live-aboards.  

The Carbon 32 photos came from columbiayachts.com and were used without permission.  

Aerocap Project

Since I started a new job recently, I have a 100 mile commute every day.  Eventually I might move closer, but currently, I would rather take the hit to commute so I can stay in Portland.  People have told me the cap looks really funny, or even dumb, but I really don't care, because I am getting 26+ MPG on the highway.  In case you forgot, it is a PICKUP TRUCK that is getting 26+ MPG.  Here is the rub: my Tacoma is supposed to get 26 MPG on the highway, but I was only averaging 24.95 MPG on the highway.  Since I put the cap on, my highway MPG average is now 26.27.  My driving has not really changed, but the MPG has improved.  While I am sure more technical ecomodders could get more out of the cap, but with just a little research into other people's projects and a cheap build, I've made a 5% improvement in my MPG without changing my speed on the highway.  That will save me about a gallon per week, which does not seem like much, but when you extrapolate that out, it is 52 gallons a year, or approximately $200 a year in savings.  It is amazing what just a little bit of modification can do for your fuel mileage.  If you're interested in learning more about ecomodding and driving for fuel efficiency, check out http://ecomodder.com/forum/EM-hypermiling-driving-tips-ecodriving.php.  This forum has been really helpful to me in trying to figure out what I was going to build, and has given me ideas for more modifications to improve my MPG.


Saturday, August 10, 2013

Big Decision and more progress....

Yes, I know it has been quite a while since I have posted, but I have been working slowly on the boat.  It has been tough, since my shoulder has not healed completely yet.  Here is what I have been up to.

Rigging

Thanks to Jim of Port Rigging for helping me get all of my rigging set up and ready to go.  I finally have running rigging (halyards) for the boat, so now I can actually put the sails up.  I've even replaced the spinnaker halyard and pulley from the original equipment (49 years old).  The shivs have been replaced also, as well as the pins they rotate on, as the previous ones were corroded into place, and some of them had to be removed by a chisel.  


Cleaning and Prep

I spent yesterday scrubbing the boat down, as the outside was growing algae or something from being under trees for who knows how long.  Just giving the old girl a scrub makes her look like a new boat.  Unfortunately because it was raining, I do not have any pictures of the newly scrubbed boat.  Jenny helped me out with getting the old name off the boat and starting to scrape the paint to get the new name on the boat.  Also, the old outboard mount came off the transom, as I decided to use the outboard well built into the boat for my small Sailpower motor.  


AirHead Progress

Since I picked up the Airhead, I have not had time to complete the plumbing for the air circulation system.  I also did not know where or how I was going to plumb it.  It ended up having to be routed through the forward bulkhead and up through the V-berth.  The electrics are not hooked up, but then again, none of the wiring is hooked up currently through the entire boat.  

Rope Work

Since my boat lacked mooring lines, I had to make them.  I found a really great deal on a spool of 1/2" three strand nylon rope, so decided to make a full set of lines.  Jenny spent some time helping/learning how to whip ropes while I spliced loops into one end of them.  I made two bow lines, two stern lines, and four spring lines, and that has barely made a dent in the 600' spool of rope.  Also, most of the lines went into the boat, into to cockpit lazarrettes.  


The Big Decision

I have been pushing very very hard to get the boat into the water this year.  I have run my summer away working weekends on the boat instead of enjoying the beautiful weather.  While I really want to go sailing this year, it looks like its not going to happen.  While it is a disappointment to realize that I am not going to make my goal, it is also a relief to know that I now have months to do all of the things that I need to do.  That means I have time to wire the electrical system, rebuild the port bunk, rewire the navigation lights on the mast, install a depth sounder, install a speed gauge, and in general just have time to do things right, rather than just get them done. 


Saturday, July 13, 2013

PROGRESS!!!!! (The problem still exists)

So progress was made today.  My dad was nice enough to come help me out since I am still in a sling from a separated shoulder.  We (and by we I of course mean my dad) got a lot done today.  The thru hulls are in and sea cocks mounted, most of the standing rigging is on, the teak handrails are back on, the running rigging I have is on, the winch on the mast is back on, and most importantly, the boat can GO IN THE WATER!!!!  I am not feeling very verbose today, so here are some pictures for your enjoyment!

This is the chain plate going in.  I did this earlier in the week to my shoulder's chagrin. 


The backing block with the bronze thru hull through the center.

Yes, I still have an addiction to drilling holes in boats.  At least this one was closed again quickly. 


Intake and outflow seacocks for the sink and icebox.  


Tuesday, July 2, 2013

This is what happens when i get bored......

I know, this blog is supposed to be about the live aboard project, but since I separated my shoulder, I am not really allowed to do anything like work, play, etc....  This is what happens when I am bored.  I was watching videos on Youtube.com and stumbled across aquaponics.  Aquaponics is a combination of hydroponics (growing plants in water) and aquaculture (growing fish).  Aquaponics seeks to find a symbiotic relationship between the fish and the plants.  The fish excrete waste, which the plants then use for fertilizer.  There is more to it than that, but I don't feel confident in my knowledge of it to explain the details to you.

In doing my searching, I tried to find a small scale project, but it looked like the ones I found were based on growing edible fish, not having a fish tank with pretty fish.  In my first idea, because I was trying to make the system without buying anything, I thought that I might be able to adapt the filter pump from the fish tank to pump water up into the growbed.  While a good idea in theory, it did not pan out, as the pump was not strong enough to lift the water the foot and a half to the growbed.


 Jenny and I worked on this project, with Jenny doing all the heavy lifting.  To the left is a picture of me being stubborn and in project mode.  I am using my knees to hold the PVC pipe that the bell siphon was made out of.  I had to cut grooves into it to allow the water to flow freely up to the stand pipe, which drains back into the fish tank.  Maybe this is why I get injured?  ;)


 This is the grow bed setup.  In the foreground is the fill pipe coming from the pump in the tank below.  The white PVC piece is the bell siphon that drains the grow bed.  It took me quite a while yesterday to get the bell siphon to work as it kept getting clogged with rocks and the pump speed was either too fast or too slow.  This type of system is designed to flood the grow bed and then totally drain again.  The flood sequence should take about 15-20 minutes, while the drain sequence should take about 2 minutes.  Currently I am running a 12 minute flood, 2 minute drain, but I cannot run the pump any slower to get the proper flood rate, because the bell siphon will not work otherwise.  I even had to get creative to redirect about 1/2 of the water flow back into the fish tank to even hope to come close to the 15 minute fill time.  I took some extra air hose for the fish tank and stuffed it into the fill hose to redirect the water elsewhere.  I considered redirecting it down through the bell siphon, but then thought that I might have trouble making the siphon break it's siphoning action.  Instead I ended up running the two air lines back down into the fish tank.
 This is the whole setup.  Jenny and I are trying a few plants to see if it even works, then we will probably go crazy and fill the grow bed with plants. Because there is not a fight between the plants for water, as they are submerged in it, the density of the plants can be significantly higher than those planted in soil.  I might have some updates on this new project as they develop.  Hope people are interested in this, and that it is a nice break from boat talk!


Thursday, June 27, 2013

Update and unhappy shoulder....

This is an update of the last few weeks, and unfortunately the work on the boat has mostly stopped because i went dirt biking on Monday and crashed.  I separated my shoulder (different than dislocation) and have to be in an immobilizing sling for 4 weeks.  It also makes typing with one hand difficult, so this will be a short post.
I have old teak on the boat, and it is bleached and nasty looking.  I could have spent a fortune on the teak restore kits, but I opted to take the cheap, non-conventional road.  I  used 60 grit sand paper to clean the hand rails up a bit, which also brought back some of their color.  Then I used tung oil instead of teak oil because tung oil is supposed to be more water proof than the teak oil.  We will see how it weathers.  The right rail has one coat of tung oil, and the left rail at the very top has been sanded, with the rest in the condition it came off the boat.

 I went last week to get my Airhead composting toilet.  More can be found on it at www.airheadtoilet.com if you're interested.  Before I could install the Airhead, I had to build a platform for the head to sit on.  I used some of the remaining 1/2 in marine plywood from the bulkhead replacement project.


After adjusting the toilet position so that I can sit on it reasonably well, I started to think about the strength of the platform.  While it is supported on all four sides, I thought that a little extra support would not be a bad thing.  I put a 1x2 spruce stringer under the plywood.  I then screwed the mounting screws for the steel brackets for the head into the plywood and stringer underneath.

This is the head in place, minus the liquid collection unit.  Being 6' tall, I find the head room in the boat mildly inadequate, even though the manufacturer claims 6'1" head room in the main cabin.  Unfortunately, the headroom in the head locker is significantly less.  The Airhead is rather tall, and when combined with low cabin height, I cannot sit upright on the Airhead. Almost, but not quite.  That's what I should have expected on a 26' sailboat.


THANK YOU CLIVE!!!!!


Clive is a pilot that I work with.  He also used to be a boat builder.  Since I have been looking for a block of teak, I thought I would ask him if he knew anyone that might have something.  Instead of asking around, he looked through his personal leftover supply of wood and found a 2"x2 1/2"x28" chunk of teak.  Not only was it big enough to make a new winch backing block for the mast (left), it also went into making oarlock blocks for Half-Shell(below).


Some other miscellaneous projects that got finished


 The forward hatch got bolted on finally, and the open mechanism was installed.  I happened to have a nice breeze over the bow, an even though the hatch opening faces aft, the draft out of the cabin was stunning.  The cabin cooled off quickly with the hatch propped open.


Remember when the mahogany molding came off the original bulk head?  Guess what!  That's right, it is back in place on the new bulk head!  Unfortunately it split when I screwed it into place, so the clamp was there to hold it in place while the wood glue set.


This is a slick experiment that my dad and I are trying.  I got a free set of oars with Half-Shell.  One of them was severely warped in two different directions.  We used 2x4 blocks to secure the oar flat to the floor (warp one taken care of), and then used more blocks to bend it to the right in the picture (warp number two taken care of).  Here is the experimental part though. My dad and I used to build and fly R/C airplanes and when you needed a curves piece, or to set a wing so it was square, you sprayed it with household ammonia to set the wood in place.  Since the oar is not balsa, nor is it small, we were not sure if it was going to work.  When I checked on it yesterday, there had been a massive improvement.  We will see how it looks this weekend after it sits in the ammonia bag a while longer.