Tuesday, April 15, 2014

I may have lied.

So I thought that I was going to get away without drilling any more holes in the bottom of the boat.  I picked up my self-powered knot meter today, and have to drill another hole in the bottom of the boat to put the paddle wheel in.  The most unfortunate part is that the thru-hull is plastic.  I really do not want to use it, but to get a knot meter with a bronze thru-hull is prohibitively expensive.  I tried to find a bronze thru-hull to replace the plastic one, but the paddle wheel does not fit in the bronze thru-hulls. (Edit: My dad and I may have come up with another solution so no hole needs to be drilled.  More on that later.)

Glass Work

When I was working on the rear hatch, I did not end up mixing enough catalyst into the resin.  As a result, only the top of the hatch hardened.  My solution, which turned out to only be sort of a solution, was to wrap the vertical edge of the hatch with more glass and resin in hopes that it would make the resin under it kick.  It mostly did the trick, but where the hatch had been rounded on the edge, the resin was still sticky.  Again I covered it with more glass and resin, and finally the hatch was ready.

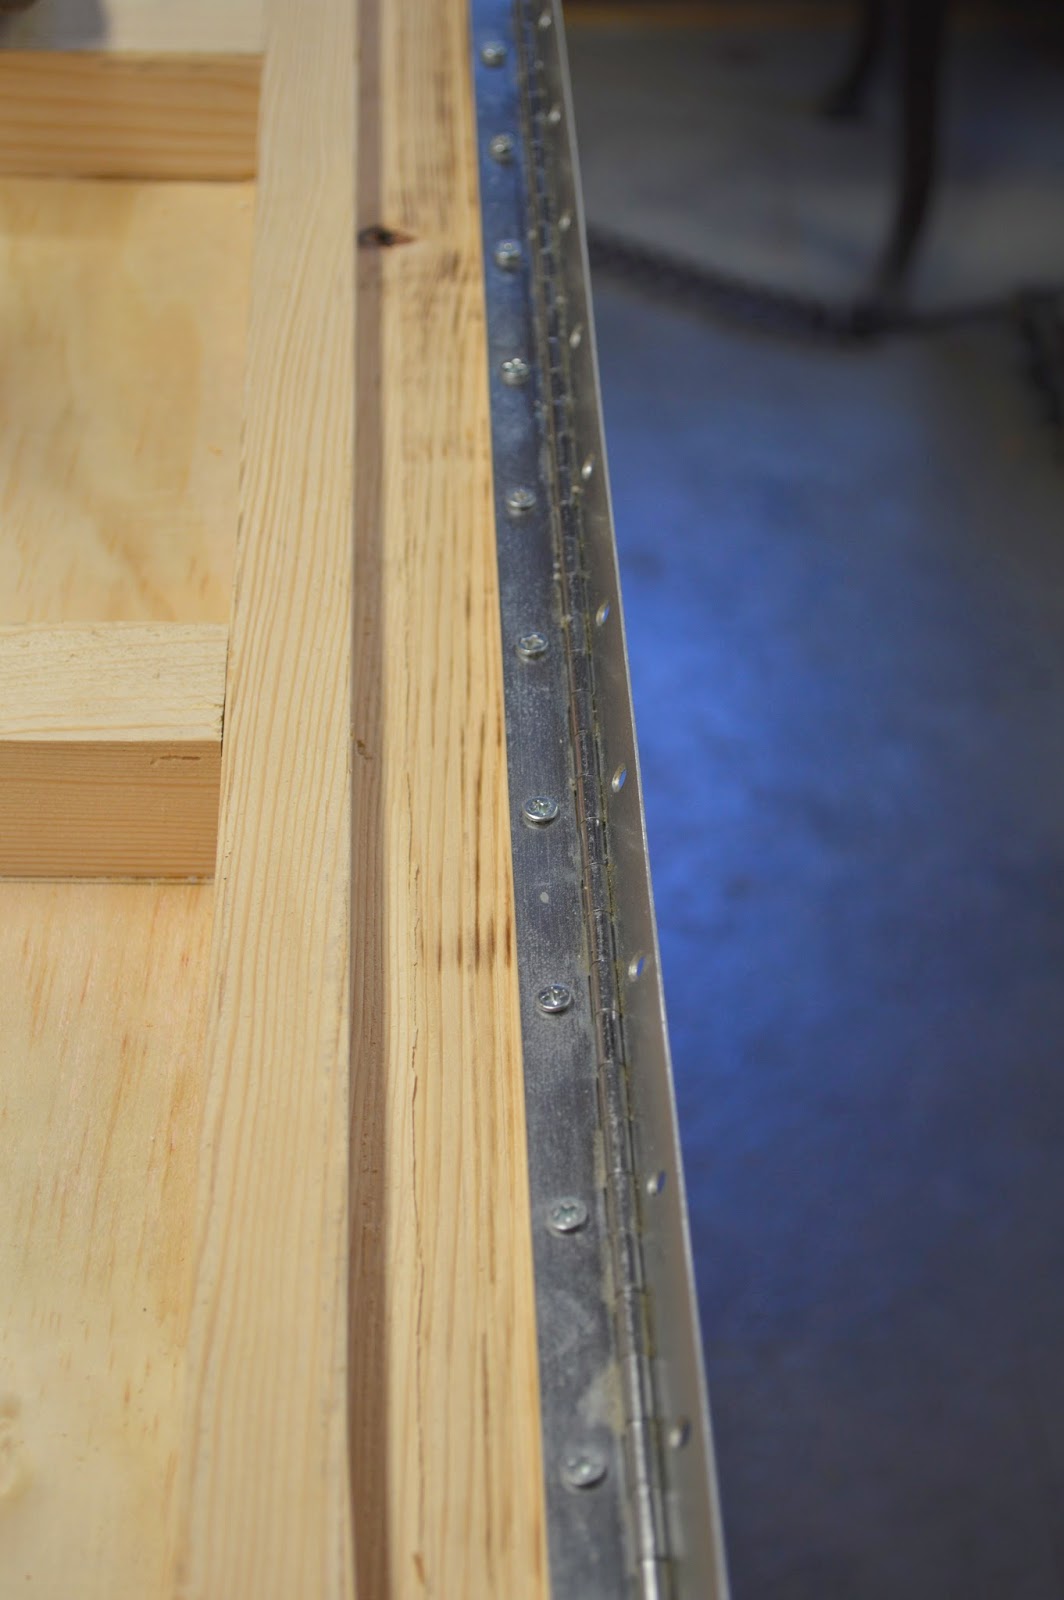
When I did the first test fit on the rear hatch, it did not quite fit.  I routed off a quarter inch from each of the short sides, and now the hatch fits like a glove.  The picture to the left is the hatch in place before I trim it to accept the hinge on the back side.  I will also be painting it so as to protect the hatch from the weather.


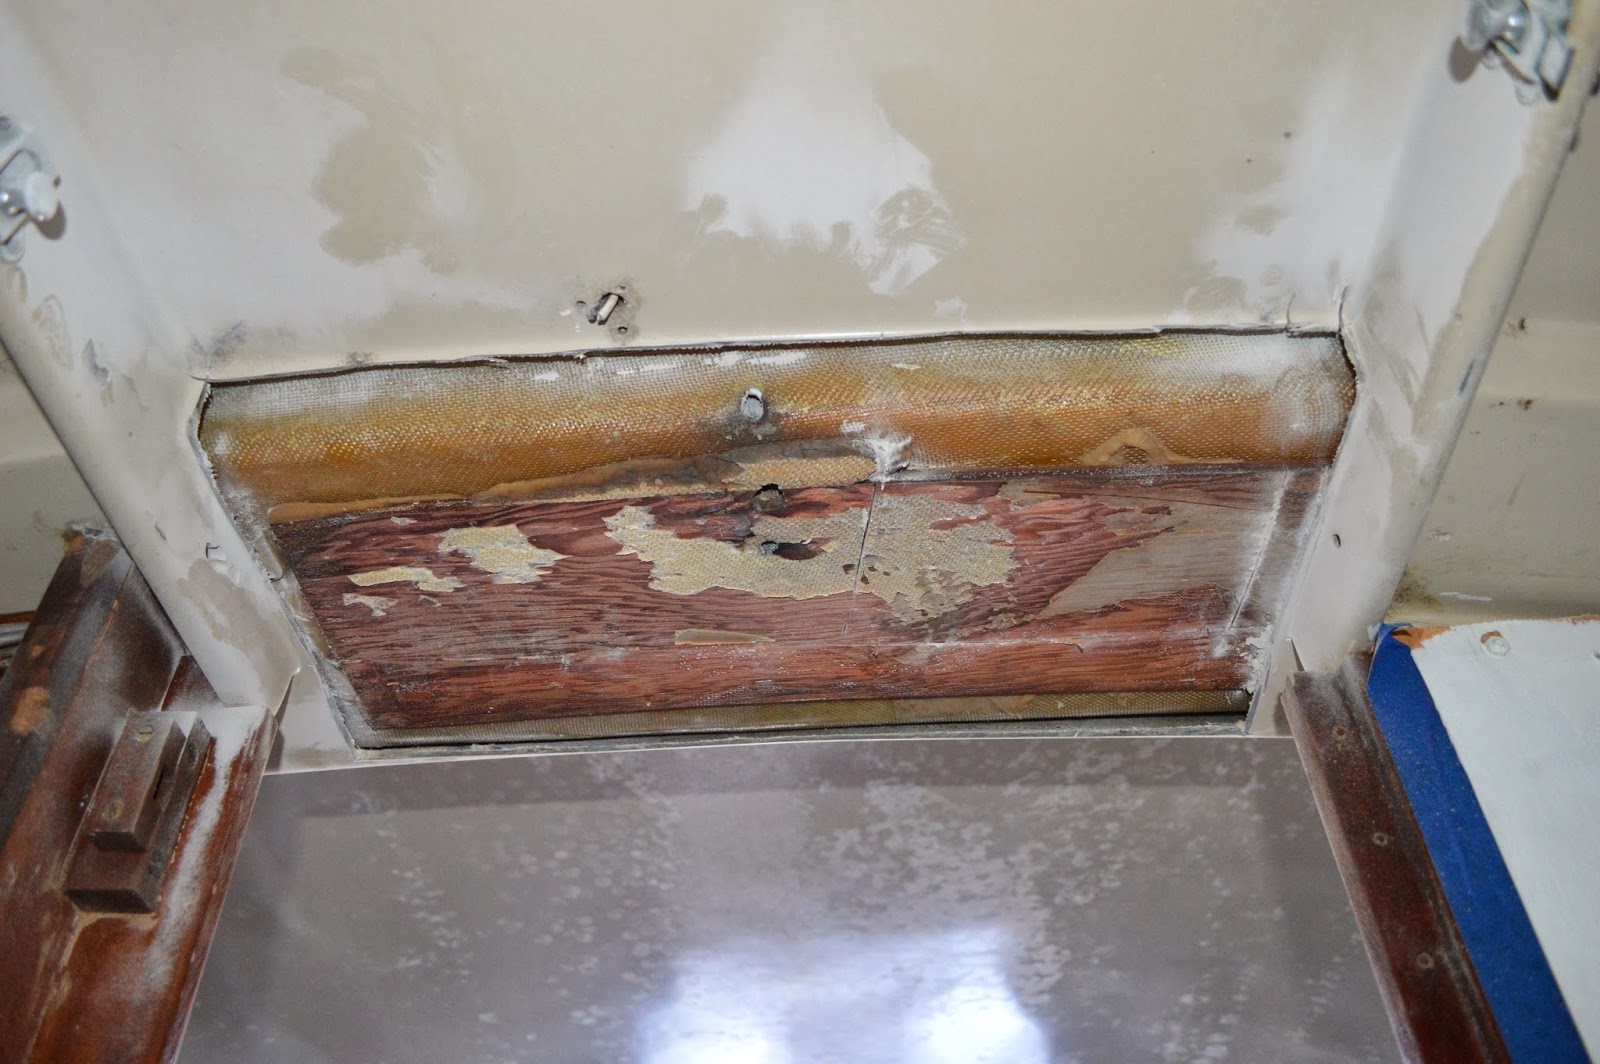
Today, because it was such a beautiful day out, I was able to glass the new support for the main hatch.  When I bought the boat, this was a mess.  The glass had been broken in a number of places, and because it was broken the cabin top had little support.  This meant that cabin top would flex a lot underfoot.  While the boat is in the water, most likely the main hatch would be open, and I would be standing on that, rather than the cabin top.  In any case, having the support back and glassed into place should make the cabin top stronger.  I also took the opportunity to drill the holes for the hatch slide.  This way I could fill them in with resin so that when they get redrilled for the screws, they will be sealed with resin.

Other Work

One of the things that I needed for the boat was a depth sounder (transducer).  Because the Maine coast is primarily rock rather than sand/silt/soft stuff, running aground here is a real crisis.  I grew up sailing on the Chesapeake Bay which is all silt/sand.  When you run aground there, which we did often because the boat drew 6'8" of water, you took a swim break, ate lunch, and then tried to get off the bottom.  This was because there was little risk of doing serious damage to the hull in a grounding in sand.  The Maine coast is mostly granite, so if you hit an underwater ledge, you better head for somewhere close to pull your boat immediately from the water because more than likely you have a hole in your boat or failure of the keel to hull joint.  Without a depth sounder, you have no idea how deep the water is, so have no clue as to when the bottom is coming up.  I want to be prepared for this, so I installed the gauge, and routed a channel in the wood paneling to hide/support the wiring.

Another way that I am trying to be prepared is by having a good bilge set up.  Even though I am reusing the bilge pump that came with the boat (tested and known to work), that is not good enough.  I also have the manual pump installed so I can pump the bilge from either in the cabin of from on deck.  To add to the safety of the system, I have added a high water alarm.  The float switch will kick on an alarm (100dB or so) when the water inside gets to a certain level.  This is an indication that there is a leak, and attention to the boat is needed.  It is also set so that it will go off well before the water reaches the floor boards in the cabin.  There is nothing like finding out your boat is taking on water like your floor boards floating.


This is the breaker panel with the new addition of the bilge alarm speaker.  I have yet to wire it up, but that is coming soon.


More Work, Same Post


While I was going to create another post for another day's work, I decided that why bother, when I had not even finished this post yet.

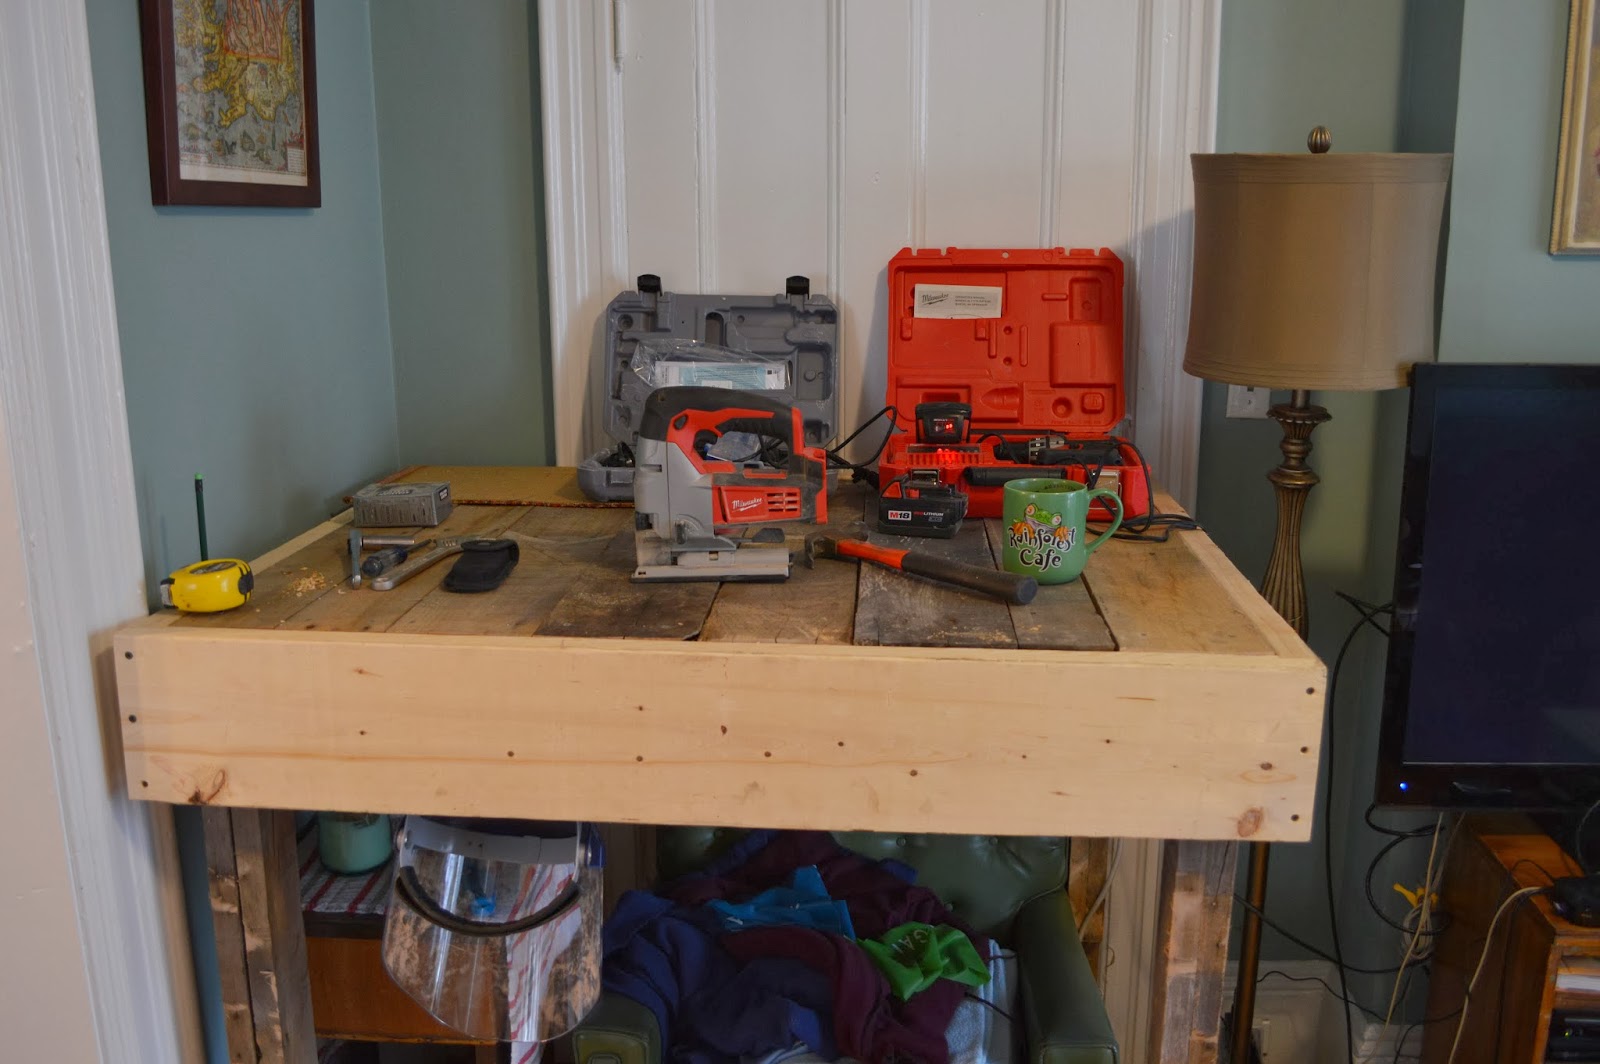
To the left is the rear lazarette hatch with the piano hinge in place.  I spent a lot of time playing with my dad's router to make some of these little projects come together.  Having access to a shop that has a lot of tools and someone with the knowledge to use them has been super beneficial to my boat project.  Plus my dad just enjoys working on boat projects anyway.


 I spent a fair amount of time researching insulation this winter, probably because it was such a long, cold, gross winter.  One of the many things that I discovered was that when doing solid insulation you should tape all of your seams to prevent airflow.  I used aluminum tape, but then ran out.  Since I was in a hurry, I finished with duct tape even though it is a poor choice.  I will go back an fix it eventually.
 I have to give credit where credit is due:  Thanks dad for crunching the numbers on this battery box and then cutting all the pieces.  It made is so I could work on other projects in the meantime.  This battery box is going to be fully glassed.  Once that is done, it will be able to hold four 6v T-105 golf cart batteries.  That leaves me a HUGE battery capacity, so I will probably start with only two 6v batteries, or maybe two 12v batteries.  I am a little up in the air about this.
The convertible chart table is almost done as well.  The table will have 2 drawers, and the whole thing will be supported on the fold out arms, as well as being bolted to the trim piece that it sits on.  There may also be a support block to hold the outboard corner.  We will see though.


I feel like I got so much accomplished this week while I was off of work.  I have been scrambling to get as much done as possible before the surveyor comes to look at the boat.  What I am really hoping is that he does not do his survey and tell me that the boat is a catastrophic failure.  It would be devastating, both to my moral but also to the dream of owning an ocean capable boat.  We shall see how I did buying the boat basically sight-unseen.

Wednesday, April 9, 2014

Something is finally hatching....

In the last two days of work, I have built a hatch in a very beefy manner, as well as get a transducer for the boat and get the boat registered for the summer.
The aft hatch to cover the outboard well is of similar construction to the fore deck hatch, in that it is of very sturdy construction.  The idea is that this hatch may have to take the weight and forces of breaking water over the stern deck, also known as "being pooped."  While the aft locker is open to the water because the outboard goes through the hull, the water would drain relatively quickly, but 50+ gallons of water at one extreme end of the boat for any length of time in seas rough enough to poop the boat is not a recipe for success.  The other idea behind making an extremely sturdy hatch is that it might help to prevent someone from stealing my outboard motor when locked down.


When I decided to round the edges of the hatch, instead of using a belt sander to do the majority of the work, I opted for a draw plane.  Yes, it is very old fashioned, but there is something really satisfying about using hand tools that are sharp and do the job.  When we live in a world where everything is powered, from our transportation to our tooth brushes, having an old fashioned way to do the same job is refreshing.  Even though I finished the sanding of the piece with the belt sander, I felt a lot more satisfaction knowing that it was my eye and steady (or not so steady) hands that shaped the wood before getting a final sanding.  It probably also helps that I had a really good idea of how the construction would go, so I could take a little extra time to do things the old fashioned way.

What is upcoming that I have NO idea how it is going to go is putting the transducer in.  I want to do an in hull transducer, rather than a thru-hull transducer.  This means that I will NOT be drilling another hole in the bottom of the boat (shocking, I know), but rather building a box or pipe for the transducer to be mounted in within the hull.  It will then be filled with water/oil/antifreeze and the sound waves beamed right through the fiberglass hull.  This eliminates yet another thru-hull, which is especially good, since bronze transducers are BIG money, and plastic ones for an ocean bound vessel are fool hardy, particularly below water line.  The down side is that I will lose some of the deep sensing capabilities, but when the water is several hundred feet deep, I don't really need to know how deep.  The depth I need to know is when it is approaching 4 feet, because that is when keel meets granite.  If you're not familiar with granite, granite is not what would give in that meeting.

Monday, April 7, 2014

Spring is finally here....

.... so I am in a race to the finish to get my boat wired, finished, and ready to go in the water!

Portland Boat Builder's Show 2014


To start, I went to the Portland Boat Builder's show again this year.  I was somewhat disappointed with the turn out by vendors, but was still quite happy to walk around and see all the shiny new things, as well as some beautiful old things as well.  While most of the vendors I had talked to last year, there were a few new ones that I had not seen.

I am pretty sure this artist was not here last year.  The birch bark over wood frame canoe that he built (left) was absolutely stunning!  I overheard him telling someone about how all of the seams are sealed, how the bark gets treated, and the number of hours that went into the boat.  While I would never buy a canoe like this, i can certainly appreciate the craftsmanship and hundreds of hours that go into a project on this scale and detail.
 The level of craftsmanship was not just limited to the boat builders.  This vendor was working in composites, and had a number of creations on display.  This trunk top was one, with the compass rose done all in carbon fiber in the original molding of the piece.  They also had a full carbon fiber cello that someone had commissioned them to make.  What a stunning instrument it was too.  Absolutely flawless.  I only wish they had someone there playing it.  
This winter, since it has been a long and cold one, I have been looking into electric propulsion.  Mostly I have been looking at people building DIY electric cars, motorcycles, and go carts.  I had forgotten about electric propulsion for boats.  I was reminded today of talking with a number of vendors at last year's boat show about electric propulsion, and that I was interested, but it was not the time for me to invest in the tech, as I had to get Lady Lucile ready for the water before beginning to try to be a relatively early adopter for all electric propulsion.  When I saw this boat (photo right) at the boat show, I was impressed by their "sail drive".  While I did not get the details about this, I am pretty sure the electric motor is in the pod with the propeller.  While this would make maintenance of the motor hard if there was a problem, I still find it to be a very neat set up.


Weekend Work

 I've been very lucky to have a dad that loves projects, and more importantly boats, as much as I do!  Because my knowledge of electronics and wiring are limited (but ever expanding), I have been relying on my dad for a lot of advice and straight up help.  He always seems to have an answer, or at least is willing to go look for one when he doesn't.  I only hope I can be as great a dad as my dad is to me!


Before we get into the wiring of the boat, I finally got the new main sheet block set up and ready for use.  I also got the quick release hook set up for recovery operations, although I hope to never have to use the main block for that purpose.  I think because I have grown up as a sailor, and spent my life around a lot of sailors, I know how valuable it is to be prepared, to think outside the box, and be prepared to wing it when all your plans to go shit.  With plans to sail a lot this summer, and to teach my girlfriend to sail my boat, I need a system for her to bring me back onto the boat should I become incapacitated in the water.  While I have not worked out the flaws in this system (aka- still an untested system) at least I am working on something.


Wiring!


Some of you my remember the home brew AC electrical system that was on the boat when I bought it.  It is gone now.  However, when I was tearing out junction boxes connected by extension cords, I noticed that some of the 12v DC wiring was of dubious quality also.  Note left that the wires are connected with wire nuts (the black things).  While this is okay for home wiring, this is just asking for trouble in marine wiring.  Not only is it an invitation for corrosion, but it is also an invitation for sparks, which lead to explosions if you have a gasoline inboard engine.

Fortunately, this particular boat does not because I knew from looking around that most all of the boat of this vintage need new engines.  To protect the boat from explosion hazards, as well as corrosion of the electrical system, I opted to maybe go a little beyond what is required and use crimp connectors with heat shrink, adhesive lined tubing (the blue things, left).  The adhesive in the shrink tubing seals the connections from the outside world, so it makes it very difficult for corrosion to take place.  Hopefully this wiring job will last another 50 years for this boat!  Unfortunately, there is still much wiring to be done inside the boat, which will hopefully be fully (or mostly) done by weeks end.

Probably the most important job to be done was to get the mast rewired and the lights replaced before the rig is put up.  The lights on the mast were both broken, with the steaming light (the light used for navigation when the boat is under engine power, rather than under sail, right) had been repaired with a screw on bottle cap.  While I appreciate the ingenuity and resourcefulness, I decided to get a new steaming light (black unit, far right) that has a fore-deck light built in.  This meant running new wiring (triplex), although I was going to run new wiring anyway, because I did not want to get the mast up and rigged only to find out that the wiring was bad, and the lights did not work, meaning either the rig would have to come back down, or I would have to go up the mast to run the new wires.  Neither option really seemed like a good idea, so rewire the mast dad and I did.

We also rewired the anchor light (or mast head light).  There was no lens left on the previous unit, and it was a chance to upgrade to an LED unit to conserve some power.  There is a little controversy about LED lights and if they are as visible as incandesent light bulbs, but I figure if the US Coast Guard has approved them for 2 mile visual range, then they must be just fine.


 Originally the mast also had a coax cable run for the VHF radio.  It was in terrible condition, so it was also removed from the mast.  While I do not have any coax cable to go in for a replacement yet, I do have a runner (aka- a string) in place to pull the new cable through when I get it and a new antenna.  The old antenna looked to be in great shape until I accidentally dropped an anchor on it and the fiberglass shattered into many many pieces.  I will be buying a metal whip antenna to replace the shattered one.  Of note also in the picture to the right is the loop of wire at the top.  I though it might be prudent to have extra wire at the top of the mast should I decide I want to replace the mast head light at some juncture down the road, and have to cut away the old light.

The Plan of Attack


 This week I will be working to get the breaker panel mounted and wired, build the 5th and final hatch for the rear lazarette,  re-register the boat, as well as get the chart table finished and mountable.  I am hoping to get all of this done, but I have been at this project long enough to know that these projects take a lot longer than I want them to.  Take wiring the mast for example: with two of us working, it took us all day to run 2 wires and a runner for the coax.  Obviously we ran into snags that we were not anticipating, as well as problems that could have been avoided had we done a bit of measuring before fully diving into the project.  Sometimes in your eagerness to get started on the project, you forget some of the basic things that can really save you headaches down the road.

The plan for next week is to get the boat surveyed so that I can finally get insurance, and get the boat in the water for the first weekend in May!  This year, no dirt bikes til the boat is in the water!!!!!


Saturday, February 1, 2014

This Post From My Accidental Man Cave!

So mostly this blog is about the rescue and restoration of a wonderful 50 year old boat.  Sometimes though, side projects creep in and because I think they are interesting, fun, or compelling, they end up on the blog too.  Earlier this week I was working at the dining room table with a Dremel tool, slipped and gouged the table.  That got me to thinking.  "If I continue to use the dining room table as a work table, I am going to destroy it.  How can I not do that?"  The solution was to build a work table for the apartment.  I also wanted to do it on the cheap (under $61, which I did).  I have been watching youtube.com videos on people doing interesting things with what is generally regarded as junk.  That was when I stumbled upon people making things out of pallets.  Bingo, cheap hardwood!  Plus, because it is already distressed from being used as a shipping pallet, I do not have to worry about not wanting to beat it up now that I have a finished project.  Here is where the accidental Man Cave comes in.  I wanted a bar height work table, as I generally prefer to stand when working on projects.  Since I made a wrong measurement on the leg length, the table edned up a bit taller than I wanted.  When I slid it into place, it fit over a chair we were going to get rid of.  When I was working on putting hooks on the inside of the table, I sat in the chair, and realized that I had a space under the table that was usable as sitting space.


 I got the opportunity to cut into the head liner on the boat to see if the mast support beam is ok or not.  Unfortunately the beam is encased in fiberglass, so I cannot tell what condition it is in.  The upside is that now that it is open, I can see once the rig is up whether the beam flexes or not.  I also found out that one of the the mast step bolts misses the support beam.  Sometimes I really wonder what they are thinking when building production boats....
 I also got the opportunity to clean up the wiring on the back of the fuse panel.  I will be adding a 12v auxiliary port to the panel soon.  There may be a battery gauge going in soon as well.
I have also had the opportunity spruce up the front of the panel as well.  It is a nice teak framing that will be epoxied and through bolted to the frame.


Sunday, January 26, 2014

Wire me up!

What better to do with a winter Sunday afternoon than to wire up some breaker panels?  While this project is not entirely finished, it is much farther along after this morning's couch session!  One of the things that made this project take a while is that all of the connections have to be shrink wrapped to prevent corrosion.  The connectors I got are specifically for marine applications.  They not only are shrink wrap, but they also have a heat activated glue that seals the connections when the shrink wrap is sealed.

After sealing the wires, I had to connect the wires for the two breaker panels to a common point.  This makes hooking up the batteries easier.  It also allows for more expansion of the electrical system should I, or someone else down the road, want to add more features/tech gadgets.  By putting the whole setup on a hinged door, access to the whole system is easier as well.  This should make for a much more user friendly system.


Something else I am working on is a main sheet recovery system for the boat.  I am a pretty big guy at 6 foot tall and about 215 lbs.  While I am a competent sailor, accidents happen.  I am very much hoping to teach my girlfriend to sail this summer, and to be able to continue to go sailing together well into the future.  The recovery system idea is based on the idea that I knock myself out and go in the water.  There is no way that Jenny could pull me out of the water on her own.  With the main sheet block and tackle system set up at 6:1 ratio, hauling my ass out of the water would not be too difficult.  To accomplish this, I have a bronze quick release on the bottom of the block that could be released to allow the boom to be swung over the side and lowered to clip onto my PFD or have a sling already attached.  With the cam cleat attached to the block system, hauling on the line from deck will automatically feed the line through the cam cleat, and prevent me (or whatever is being hauled on deck) from falling back into the water if the hauler looses their grip on the line.  While I still have a few kinks to work out of the system, this is the first step towards that end goal.

Sunday, January 19, 2014

Done Taking a Break(er)!

Now that the craziness of the holiday season is over, I have more time to get back to the boat.  I have started on the wiring.  I have been doing a lot of research, and now am in the process of actually doing.  The breaker panels have been set up to cover all of the functions that I thin the boat needs to have, or I want to have.  It took me some looking to figure out which functions have to get wired up together, but I think its ready to go.  I am looking forward to getting this all in the boat and out of the dining room.


 As you can see, the wiring is already a mess, and I have not even added my wiring to it yet.  I have a bus to add so that I can connect the power from the batteries to the two independent breaker panels.  Also, should I want to add other non-switched features, it give me the ability to add on without adding more hardware to the panel set up I have going currently.


I know some of you have been chomping at the bit for more updates, and they will come soon.  Hopefully fast and furious!


Sunday, November 3, 2013

More Construction!!!

So I spent a fair amount of my week of my week off from work thinking about my project and looking through electronics like Navigation lights, VHF radios, depth sounders, knot meters, etc.  The trend in the nautical world is to network everything together and rely on that networked system for all of your information for navigation.  I think this is silly, and would rather keep everything as simple as possible.  When people only rely on the GPS rather than using their eyes, it can lead to running their boats aground, or worse, run them to their death.  Things like solar flares and sun spots can throw off the GPS as much as several hundred feet.  When you are used to making a passage within several hundred feet of an offshore obstacle, with your GPS telling you that you are in one place, when the reality is you are not where you GPS is showing.  With that as a possibility, I would rather rely on dead reckoning, piloting, and navigation skills.


Since I feel the need to have a chart table, as well as retain the original 4 bunks in the boat, I have come up with a convertible chart table idea that is finally moving into the building faze.  I am also working on relocating the fuse panels to a location where they are accessible, rather than at the front of the boat where they were from the original owner/manufacturer.

The fuse panel will be hinged so that when electrical gadgets want to be added or removed, it will be easy to access them.  Also, there will be bookshelves going in next to the fuse panel to hold all of my nautical information.  This refit has made the bunk narrower, but it will make a great sea bunk because it is narrow.  The catch 22 of that is this: when you are at sea, probably going to have the chart table up for navigation, rendering the bunk useless for sleeping (unless you are a small child).

Originally I was going to raise the bunk 9 inches to the level of a proper seat for the chart table, but realized that going to that extreme of customization would make the boat less appealing for resale.  Instead I decided to make a box to sit on, but my sister made a great recommendation for the seat.  I am going to make a fold away seat that is mounted under the fuse panels.  I think it is a better solution to the seating problem, as it just folds up out of the way, rather than having to stow a box somewhere.

It feels good to be moving along.  The next major project is rebuilding the mast support, but I do not have any information on what the beam is made from, nor the best way to get it out and replace it with another one.  What makes it tricky is the one piece headliner that was obviously put in before the deck and mast support were put on.  If anyone  has information regarding this problem, I would greatly appreciate the help!